What is Adobe Photoshop 7.0?
The landmark 2002 release that shaped modern photo editing and why millions of users still search for it every month in 2026
The Last of the Classic Photoshop Era
Adobe Photoshop 7.0 is a professional raster graphics editor published by Adobe Inc. and released on March 5, 2002 under the internal codename Liquid Sky. It was the final major version before the Creative Suite era began with Photoshop CS (version 8.0) in October 2003, making it a landmark release that closed an era and established many standards that persist in the software today.
This version marked a defining milestone in Photoshop history because it was the first Photoshop release to natively support Mac OS X, bringing genuine cross-platform compatibility to professional designers and photographers for the very first time. For Windows users running Windows 98, Windows ME, Windows 2000, and Windows XP, it delivered the most powerful and stable image editing environment Adobe had yet produced.
In India and across South Asia, Photoshop 7.0 remains the single most searched version of Photoshop, generating over 12,000 monthly searches in India alone just for its download page. Its lightweight footprint of only 220 MB, very low system requirements of 128 MB RAM, and an original one-time purchase pricing model make it the preferred choice for millions of design students, small studios, photographers, and budget-conscious creators who cannot afford the current Photoshop CC subscription of USD 23.49 per month.
- Released: March 5, 2002 by Adobe Inc. under codename Liquid Sky
- Type: Professional raster graphics editor
- Compatible with: Windows 98, ME, 2000, XP, Vista (and with compatibility mode, Windows 7, 10, and 11)
- First Photoshop with: Native Mac OS X support, Healing Brush Tool, File Browser
- Successor: Adobe Photoshop CS released October 2003
Adobe Photoshop 7.0 is no longer officially sold by Adobe. However, preservation copies are available through the Internet Archive and other third-party sources that legally host legacy software. Adobe does not provide serial numbers, updates, or support for this version. This site helps you understand what is legitimate, what is safe, and what actually works on modern hardware in 2026.
Understanding Photoshop 7.0 requires appreciating the context of what the software landscape looked like in 2002. Digital photography was just becoming mainstream as affordable consumer cameras entered the market, and designers needed a powerful but accessible tool that could handle real-world retouching, compositing, and web design work without requiring extremely high-end hardware. Photoshop 7.0 answered that need with a streamlined interface, powerful new retouching tools including the groundbreaking Healing Brush, and a vastly improved file management system through the new File Browser panel.
Even in 2026, graphic design students in India, Bangladesh, Pakistan, Sri Lanka, and across Southeast Asia search regularly for phrases like how to download Adobe Photoshop 7.0 for free, Adobe Photoshop 7.0 free download full version with key for Windows 10, and how to install Adobe Photoshop 7.0 in Windows 10, because the software genuinely delivers professional-quality results on budget hardware that simply cannot run the resource-intensive modern Photoshop CC subscription product.
Adobe Photoshop 7.0 History: A Complete Timeline
How this version fits into Photoshop's full evolution from 2002 to 2026 and why it still matters to designers worldwide
Adobe Photoshop 7.0 Released under Codename Liquid Sky
Adobe released Photoshop 7.0 with the Healing Brush Tool, File Browser, Auto Color, Patch Tool, native Mac OS X support, vector text improvements, and ZoomView technology. System requirements at the time were Windows 98 or XP, a Pentium III processor, and 128 MB of RAM. This was when Adobe Photoshop 7.0 was released, in the first quarter of 2002.
Photoshop CS (Version 8.0): The Creative Suite Era Begins
Adobe rebranded Photoshop as part of its new Creative Suite product family. This was the official successor to version 7.0, introducing Camera Raw support, Layer Comps, and Match Color. Photoshop 7.0 officially became legacy software from this point forward, receiving no further updates or patches from Adobe.
CS2 Through CS5: Smart Objects and Content-Aware Fill Arrive
Content-Aware Fill introduced in CS5 during 2010 was the feature most missed by Photoshop 7.0 users. Smart Objects introduced in CS2 in 2005 and advanced healing tools widened the gap between the 7.0 feature set and what the modern versions offered. Photoshop 7.0 searches began growing as CC subscription pricing approached.
Photoshop CC Subscription Model Begins
Adobe shifted to Creative Cloud with a mandatory monthly subscription of approximately USD 23 per month. This is the precise moment when Photoshop 7.0 searches spiked globally, as users who could not afford ongoing subscription costs turned back to the free legacy version for their everyday editing needs.
AI-Powered Photoshop: Neural Filters, Sky Replacement, Generative Fill
Neural Filters in 2021, Sky Replacement in 2021, and Generative Fill powered by artificial intelligence in 2023 placed modern Photoshop in an entirely different product category. These features are completely absent in Photoshop 7.0. The gap between the free legacy version and the paid subscription product widened further than ever before.
Photoshop 7.0 Still Going Strong After 24 Years
With 12,000 or more monthly searches in India alone, Adobe Photoshop 7.0 remains one of the most sought-after image editing tools globally among budget users and learners. This comprehensive guide exists to help every one of those users get the maximum value out of the software and understand exactly what it can and cannot do in 2026.
All Features of Adobe Photoshop 7.0 Explained
Every major tool and capability described in plain language with practical context for real editing workflows
Healing Brush Tool
The defining new feature of Photoshop 7.0 and arguably its most significant contribution to the entire history of photo editing software. Unlike the Clone Stamp tool which simply copies pixels from one area to another, the Healing Brush intelligently blends sampled pixels with the surrounding texture, tone, and shading of the target area, producing corrections that appear completely natural and invisible to the human eye. This is the primary tool for removing blemishes, scratches, skin imperfections, and portrait retouching. The Healing Brush remains in every subsequent version of Photoshop today and inspired similar healing tools in GIMP, Lightroom, and every other major photo editor that followed.
File Browser for Image Management
A groundbreaking panel that introduced complete visual file management directly inside Photoshop without needing to switch to Windows Explorer or any third-party application. The File Browser displays full thumbnail previews of all images in the current folder, shows EXIF metadata including camera model, lens information, shutter speed, aperture, ISO rating, and the date and time each photo was taken. Designers can drag images directly from the browser into open documents, rank images with star ratings for culling, sort by any metadata field, and batch rename entire folders of files using custom naming patterns with sequential numbering. This feature later evolved into the dedicated Adobe Bridge application introduced with Photoshop CS2 in 2005.
Auto Color Correction
A single-click intelligent algorithm that delivers optimal color balance correction across all three color channels simultaneously without any manual adjustment. Far more accurate than the simpler Auto Contrast or Auto Levels commands that preceded it, Auto Color analyses the full tonal distribution of an image to identify what should be neutral grey and corrects color cast, color shift, and white balance errors automatically. It was a significant accelerator for professional photographers processing large numbers of images from challenging mixed-lighting environments, such as indoor events, restaurants, and studio shoots. The algorithm works by finding the darkest and lightest pixels in the image and clipping shadows and highlights to optimise the full available tonal range.
Patch Tool for Seamless Retouching
The Patch Tool enables seamless selection, removal, and replacement of image areas using a lasso-style freehand selection. Draw around any area you want to remove, drag the selection to a clean area of the image that matches the texture you want to replace it with, and Photoshop automatically blends the replacement perfectly with the surrounding pixels. It is ideal for removing large blemishes, unwanted objects, background distractions, and skin imperfections where the Healing Brush would require too many individual strokes. Professional retouchers use the Patch Tool combined with the Healing Brush to achieve completely clean portrait skin with no visible signs of editing.
Vector Text Capabilities
Photoshop 7.0 introduced full vector-based text rendering that keeps all type sharp and crisp at any size and any resolution. Text is stored as vector outlines rather than as pixels, meaning you can resize a text layer to any dimensions without pixelation, aliasing, or softening of any kind. The text engine supports full character spacing, leading, tracking, kerning, paragraph justification, and vertical text orientation. Designers can work with text in multiple scripts including Latin, Hindi Devanagari, Bangla, Arabic, Punjabi Gurmukhi, Tamil, and Telugu by installing the appropriate fonts and configuring the Windows input method appropriately. Warped text effects are available through the built-in Warp Text dialogue under the Layer menu.
Layer Styles and Non-Destructive Effects
The layer-based workflow with full Layer Styles allows completely non-destructive editing at a professional level. Each layer in the Layers panel is an independent element with its own visibility, opacity, blend mode, lock state, and style settings. Layer Styles apply visual effects including drop shadows, inner shadows, outer glow, inner glow, bevel and emboss, satin overlay, color overlay, gradient overlay, pattern overlay, and stroke effects. All of these effects are parametric and can be adjusted, hidden, or removed at any point in the workflow without affecting the original layer content. This makes Photoshop 7.0 ideal for creating logos, banners, visiting cards, brochures, and any design project that requires multiple revisions.
Complete Selection Tools Suite
Photoshop 7.0 includes a comprehensive set of selection tools that forms the foundation of all advanced editing work: the Rectangular Marquee, Elliptical Marquee, Single Row, and Single Column Marquee for geometric shapes; the Lasso, Polygonal Lasso, and Magnetic Lasso for freehand and edge-following selections; and the Magic Wand for colour-based selection. Holding Shift adds to an existing selection, holding Alt subtracts from it, and holding Shift and Alt together selects the intersection. The Select menu provides access to Feather for soft edges, Grow and Similar for expanding colour-based selections, and the ability to save and load named selections as alpha channels for reuse across the project.
Pen Tool and Vector Paths
The Pen Tool creates precision Bezier curve paths for masking, cutting out subjects, and drawing custom vector shapes. Every path is made of anchor points connected by straight or curved line segments, each of which is individually adjustable at any time using the Direct Selection tool. The Pen Tool produces the cleanest possible selections for product photography cutouts, hair masking, logo design, and any task where the quality of the edge is critical for professional or print-ready output. Once a closed path is drawn it can be converted to a pixel selection, used as a vector mask on any layer, or exported as a shape layer.
Shape Tool for Design Work
The Shape Tool suite covers six primary shape categories: Rectangle, Rounded Rectangle, Ellipse, Polygon, Line, and Custom Shape. All shapes are created as resolution-independent vector elements that remain perfectly sharp at any size or print resolution. Custom shapes include arrows, stars, speech bubbles, animals, ornamental designs, and hundreds of other presets. The Shape Tool is the foundation of logo design, banner creation, poster layout, and brochure design in Photoshop 7.0, allowing designers to build complex vector compositions on separate layers with full Layer Style effects applied.
Slice Feature for Web Design
The Slice Tool divides a complete design layout into individual rectangular segments, each of which can be independently named, linked, assigned alt text, and exported with its own compression settings. This workflow was essential in the early 2000s when entire website layouts were created in Photoshop and then cut into individual images for HTML assembly. The Slice Select Tool allows repositioning, resizing, and deletion of individual slices. The Save for Web command exports all slices simultaneously, generating an HTML file and images folder with every element precisely positioned and optimised.
Full Retouching Toolkit
Beyond the Healing Brush, Photoshop 7.0 provides a comprehensive set of retouching brushes including the Dodge Tool for brightening specific areas, the Burn Tool for darkening shadows and adding depth, the Sponge Tool for increasing or decreasing colour saturation, the Blur Tool for softening hard edges, the Sharpen Tool for enhancing edge definition, and the Smudge Tool for blending pixel areas together like wet paint. Combined with the Healing Brush and Patch Tool, this set covers every common portrait and landscape retouching requirement from removing pimples and dark circles to smoothing skin and enhancing eye sparkle.
ZoomView Technology
An advanced image delivery feature that enables exporting high-resolution images in Viewpoint's integrated zoomable format for online publishing. Users can create interactive, tile-based zoomable image viewers for embedding in websites, allowing site visitors to zoom in and pan across large images without downloading the full file. This was particularly valued by museum websites, architectural portfolios, real-estate listings, and product galleries in the early web era where detailed inspection of large images was needed but download bandwidth was limited.
Tool Presets for Workflow Speed
Save any combination of tool settings including brush size, opacity, hardness, flow, blend mode, and colour as a named Tool Preset that can be recalled instantly with a single click. This eliminates the repetitive manual reconfiguration of tools between tasks and dramatically accelerates production workflows. A retouching specialist can save presets for their go-to Healing Brush size for skin work, a larger Blur Tool for backgrounds, and a specific Clone Stamp setup for architectural retouching, switching between them in one click without interrupting their concentration on the image.
Multiple Workspace Layouts
Photoshop 7.0 allows users to create and save named Workspace configurations that define the exact position, size, and visibility of every panel on screen. A retouching workspace places the Layers, History, and Actions panels in their optimum positions for portrait work, while a web design workspace might foreground the Info panel and colour swatches. Switching workspaces takes a single menu click and instantly reconfigures the entire interface without losing any open documents, making it easy to move fluidly between different types of projects throughout the working day.
Scripting and Automation Support
Photoshop 7.0 supports AppleScript on Mac, and both JavaScript and VBScript on Windows for automating repetitive batch operations. Common automation tasks include batch resizing hundreds of images to a specific pixel dimension, applying a watermark to an entire folder of product photographs, converting a batch of files from PSD to JPEG at specific quality settings, and running a series of adjustments on every image in a folder. Scripts can be saved as Actions using the Actions panel for playback in the Batch dialog, enabling even non-programmers to automate their most repetitive production tasks.
Smart Object and Edit History
Photoshop 7.0 maintains a complete edit history through the History panel, recording every brush stroke, adjustment, transformation, and filter application as individual history states. You can step backwards through up to the number of history states defined in Preferences (default 20, adjustable to 100 or more) to undo any mistake at any point in your editing session. The History Brush Tool allows painting back earlier states of a specific area of the image while leaving the rest at the current state, enabling targeted undo of specific edits on specific portions of the canvas.
Key Photoshop 7.0 Features with Screenshots
Real screenshots from Adobe Photoshop 7.0 showing four of its most important tools with full explanations
Auto Color: One-Click Color Perfection
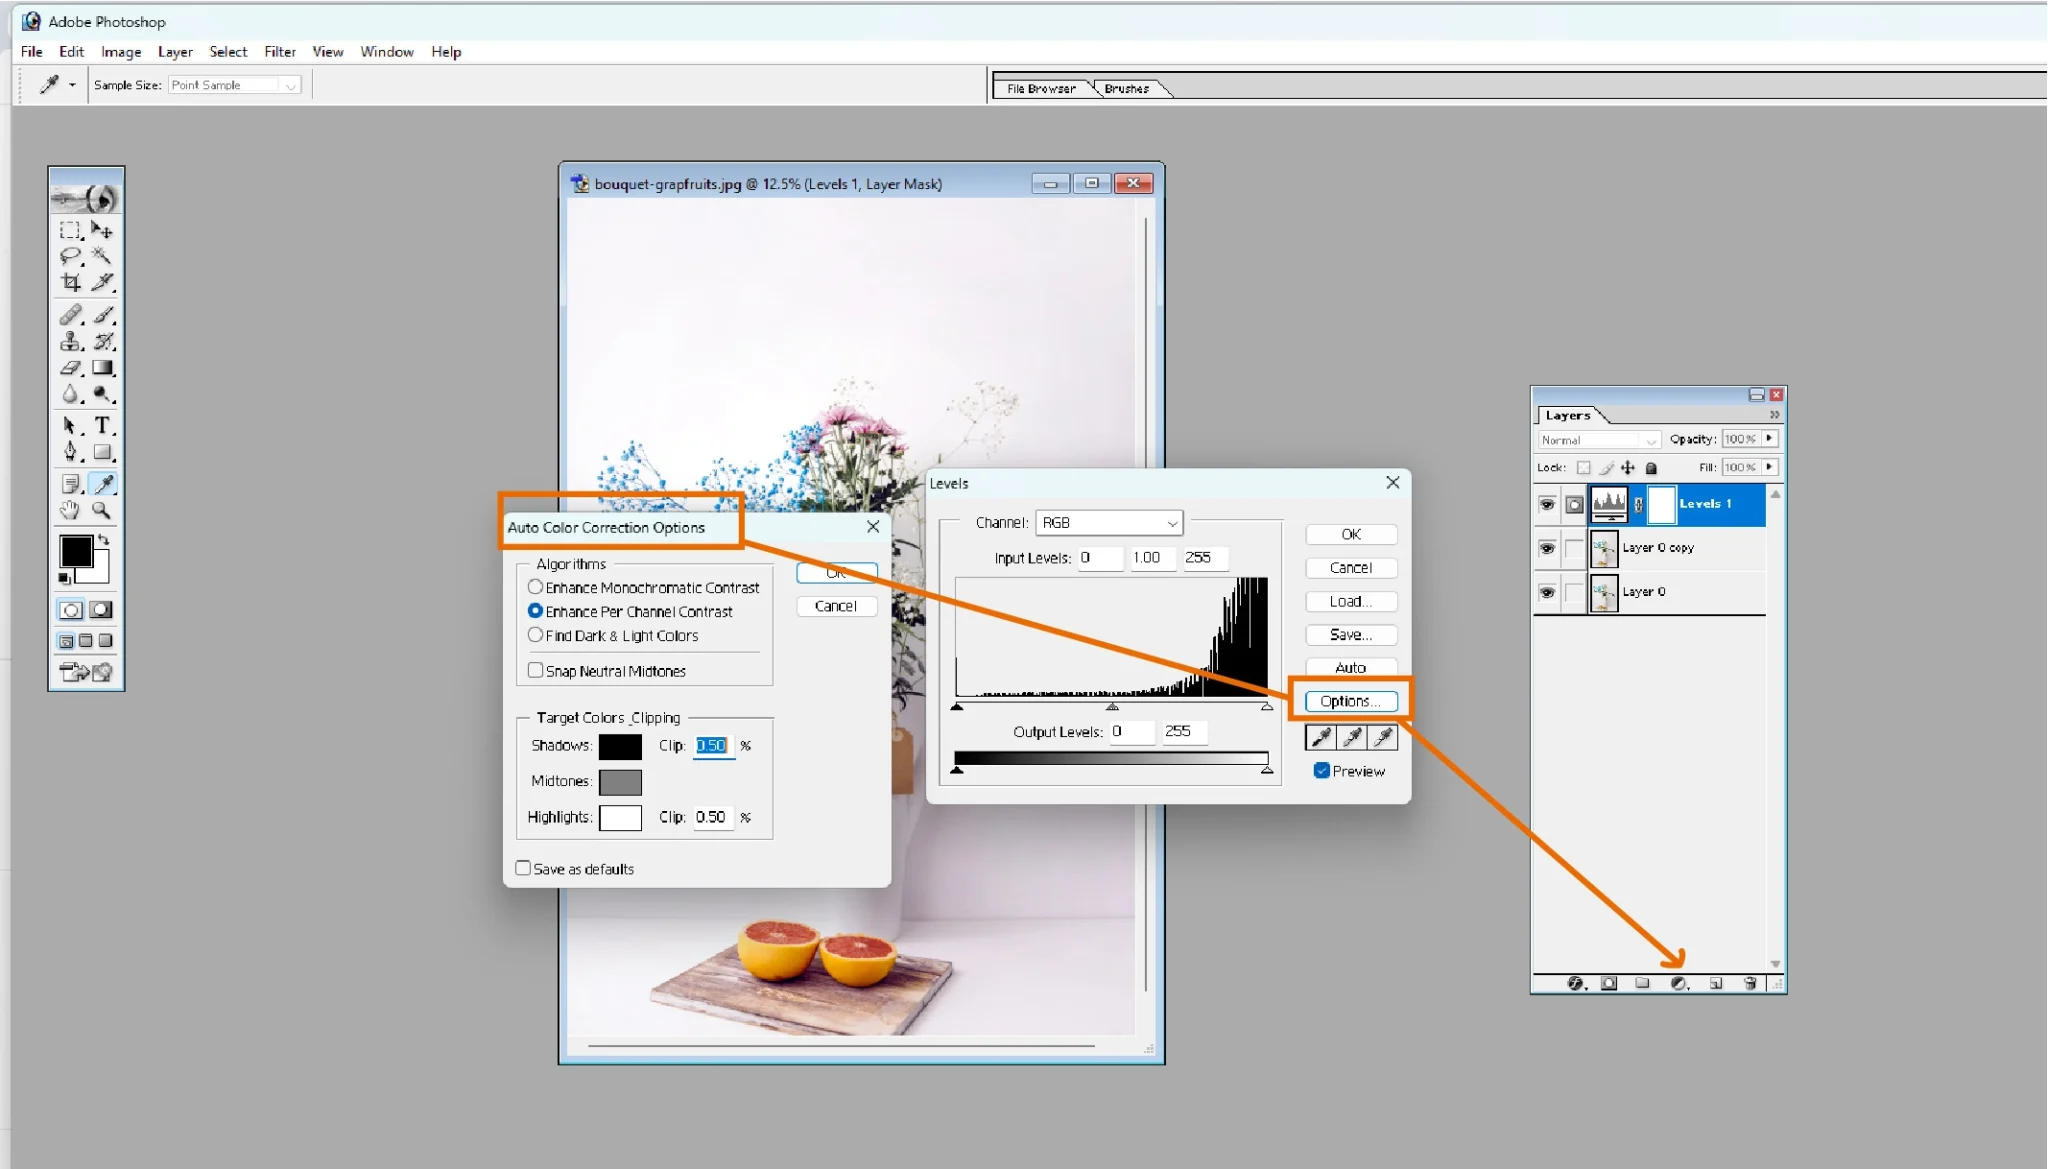
The Auto Color feature in Adobe Photoshop 7.0 is one of the most practically useful additions in this version. It automatically analyses every pixel in your image and applies intelligent corrections to the red, green, and blue channels independently to achieve optimal color balance, neutralise unwanted color cast, and maximise the tonal range from deepest shadow to brightest highlight.
How to use Auto Color in Adobe Photoshop 7.0: Go to Image, then Adjustments, then Auto Color. Alternatively press Shift and Ctrl and B together as a keyboard shortcut. For more precise control over the auto-correction algorithm, open Curves from Image then Adjustments, click the Options button in the Curves dialogue, and adjust the Target Colors and Clipping settings to fine-tune which areas of the image the algorithm uses as reference points for neutral colour.
- Instantly corrects color cast from mixed indoor and outdoor lighting
- Effective on both portrait photography and landscape images
- Can be applied as part of an Action script for batch processing
- More reliable than manual curve adjustments for quick turnaround work
- Works best when combined with a manual Levels check afterwards
File Browser: Built-In Photo Management
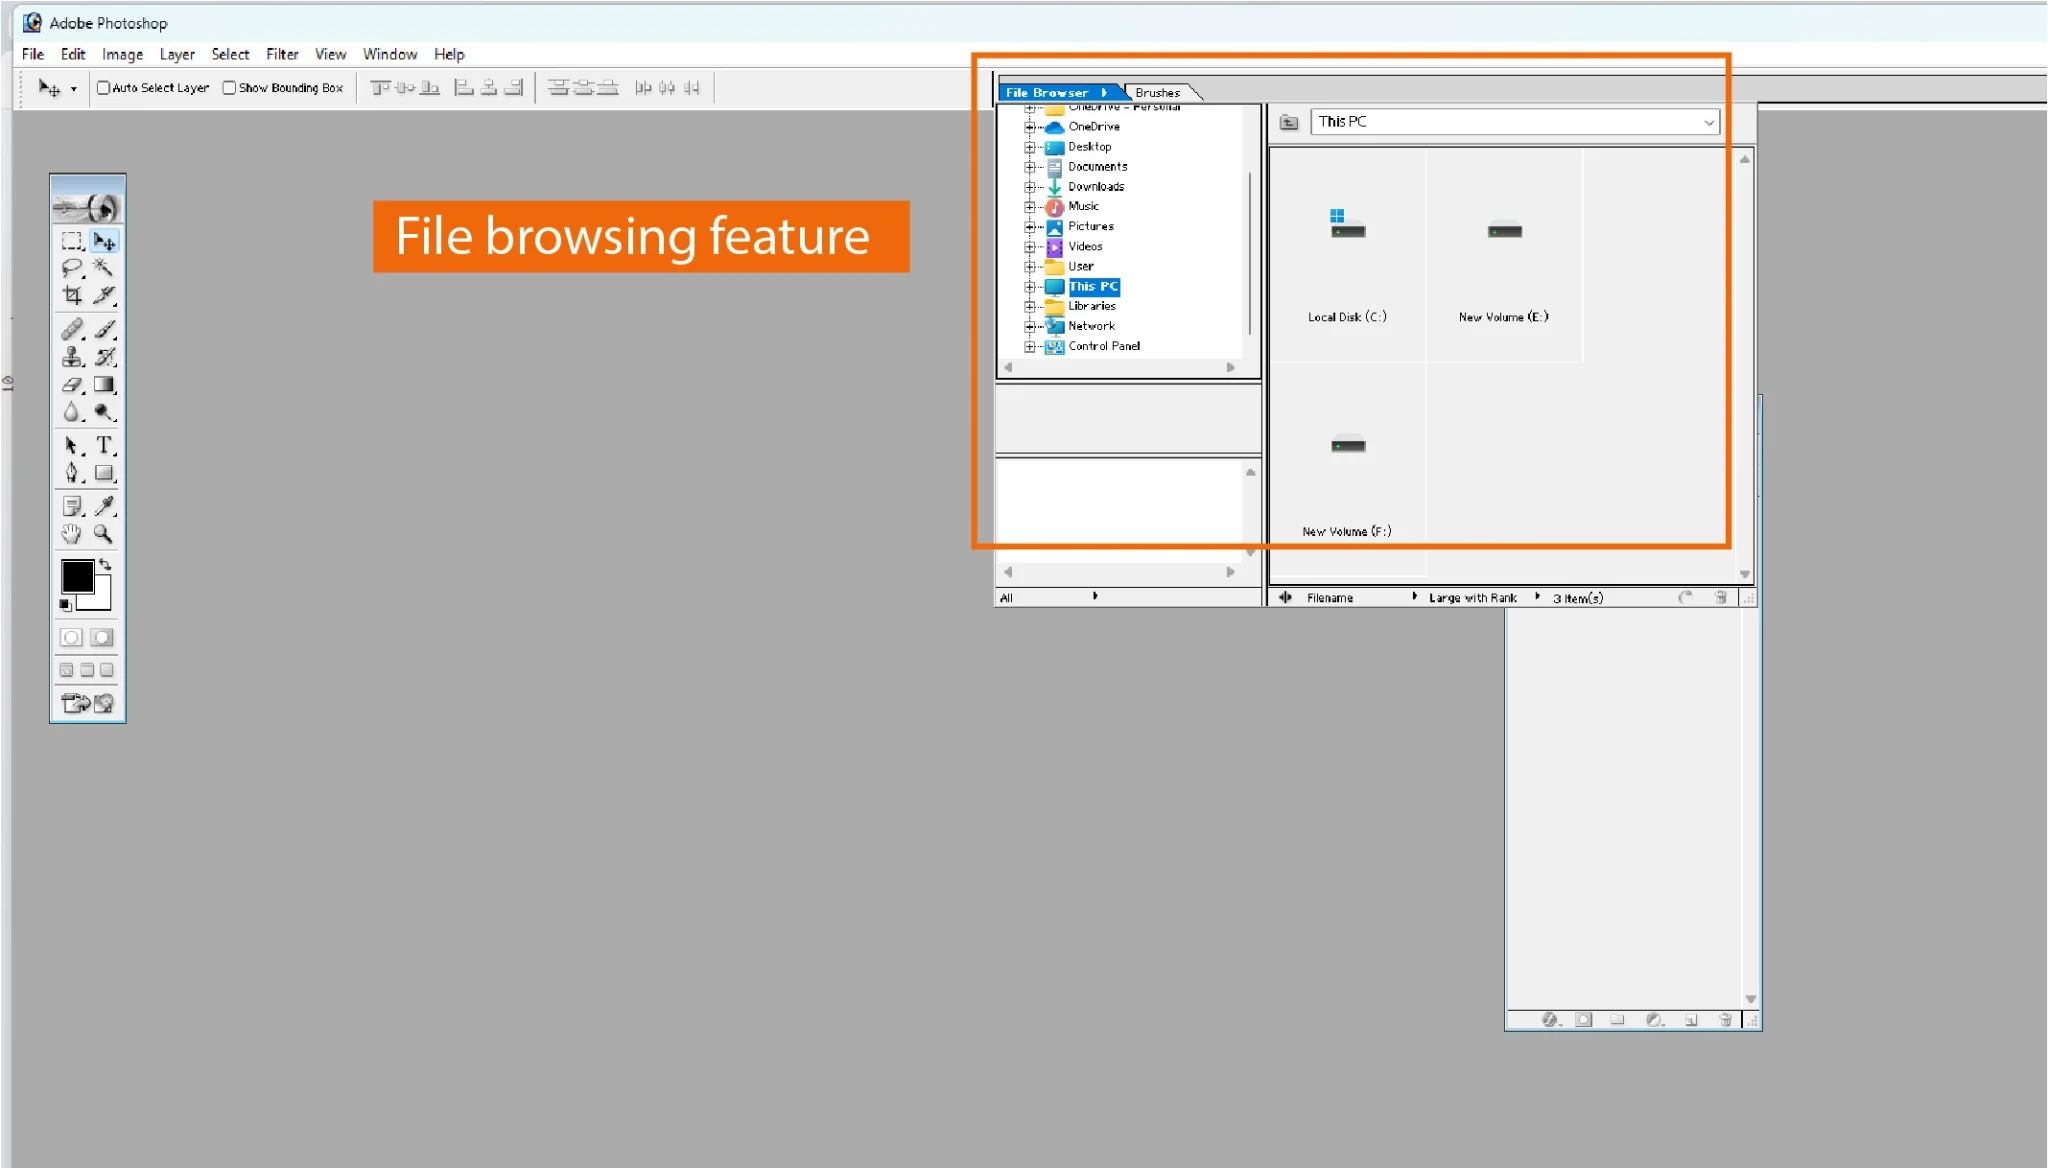
Before Adobe Bridge arrived with Photoshop CS2 in 2005, the Photoshop 7.0 File Browser was the most capable in-application file management tool any version of Photoshop had ever included. Accessed through File then Browse from the menu bar, the File Browser panel opens as a floating window that displays thumbnail previews of every image in the currently selected directory, along with complete EXIF metadata in the info pane below the thumbnail.
The File Browser supports every image file format that Photoshop 7.0 can open, allowing designers to visually compare dozens of images at once before deciding which ones to open for editing. The batch rename function can rename an entire folder of images in seconds using customisable patterns that combine descriptive text, sequential numbering, date information, and file extension conversion all in a single operation.
- EXIF data view: camera model, lens, shutter speed, aperture, ISO, date
- Batch rename: rename entire folders with sequential number patterns
- Sort by filename, date modified, file size, colour profile, or rank rating
- Lossless JPEG rotation without re-encoding and quality loss
- Drag images directly from the browser into any open Photoshop document
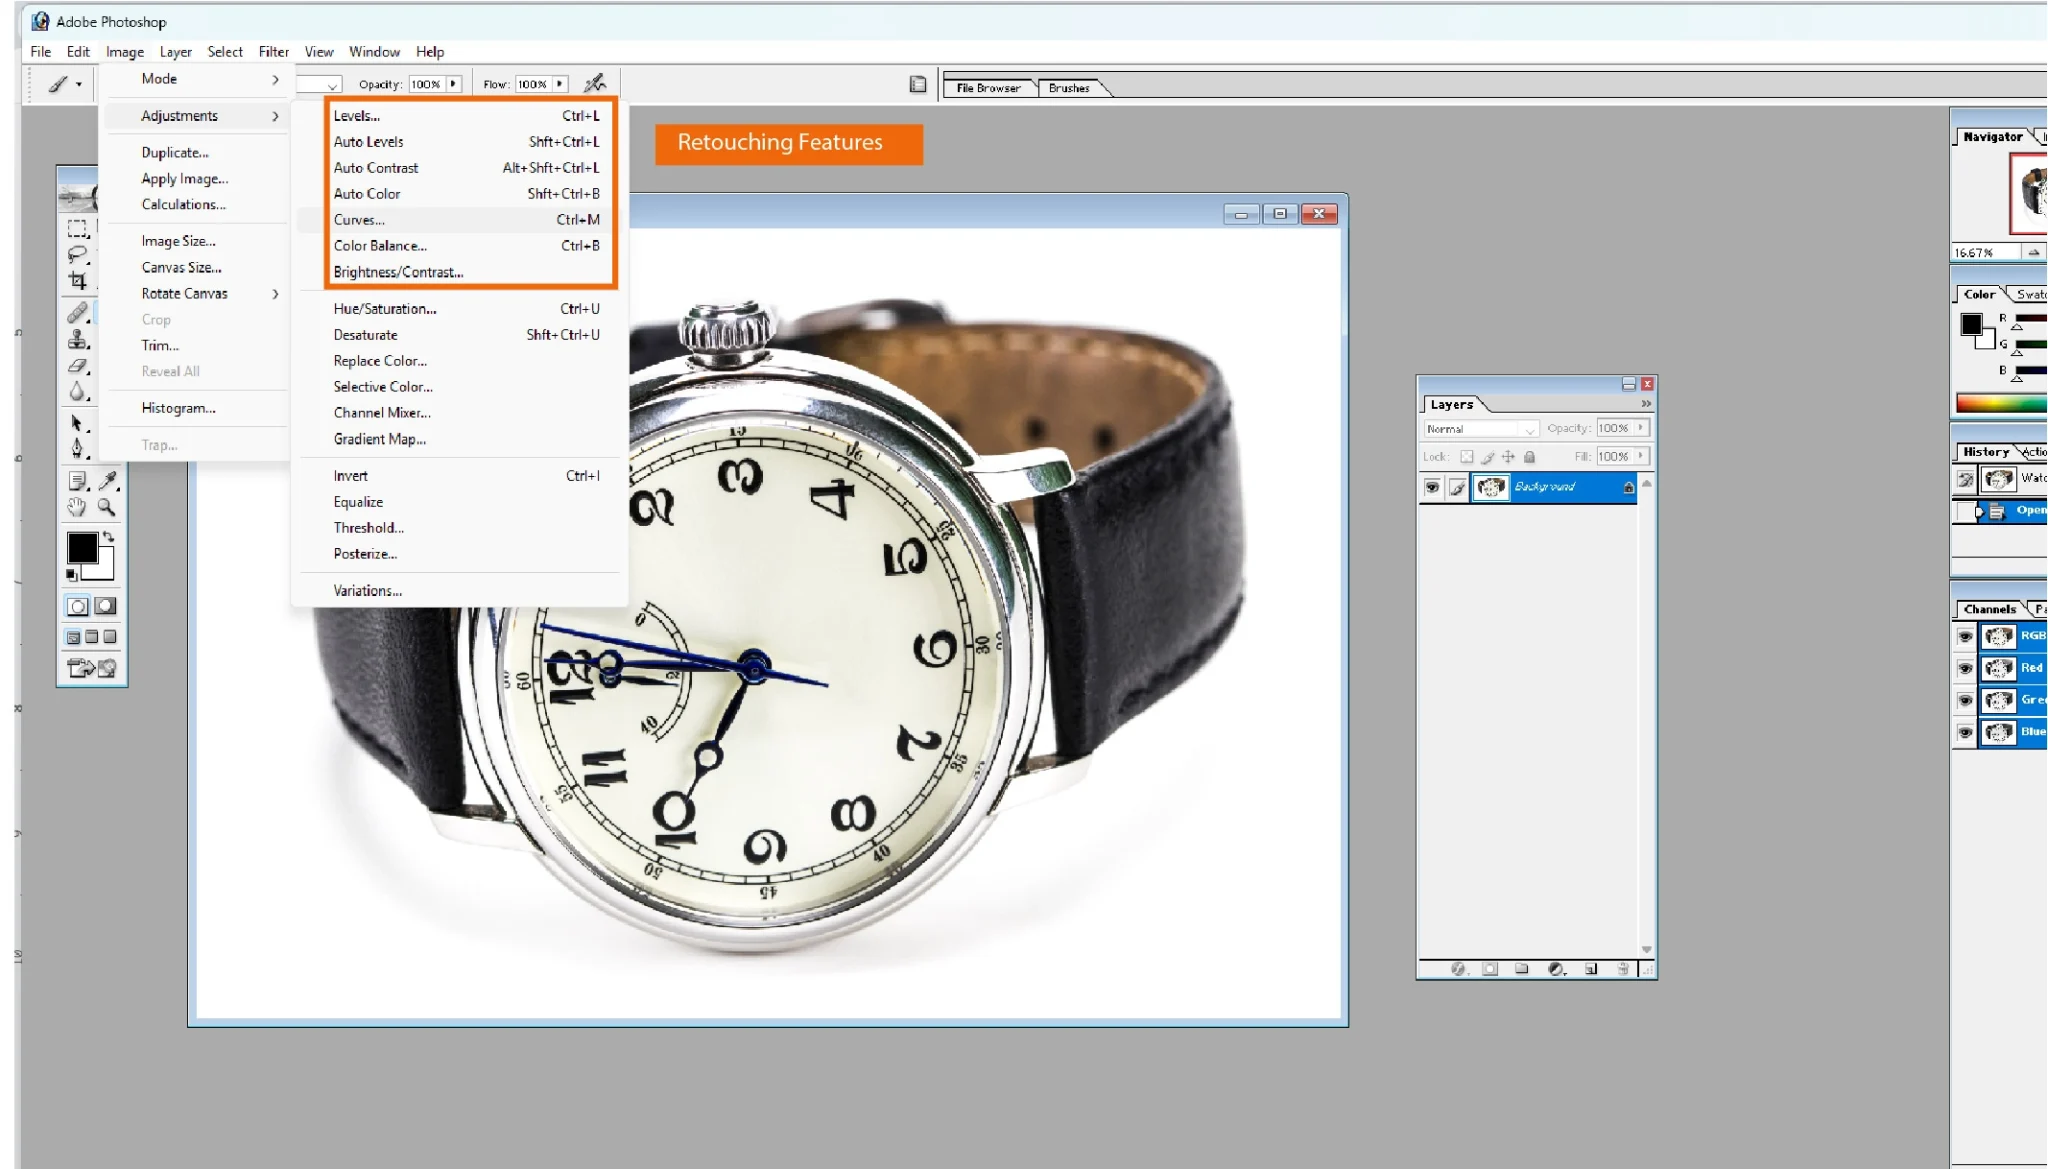
Retouching Tools: Professional Portrait Editing
The retouching capability of Photoshop 7.0 is built around the revolutionary Healing Brush and is complemented by a full suite of supporting tools that together form a complete professional portrait retouching workflow. This is directly relevant to the many users searching for answers to questions like how to clean face in Adobe Photoshop 7.0, how to remove pimples in Adobe Photoshop 7.0, how to make face white in Adobe Photoshop 7.0, and how to remove dark circles in Adobe Photoshop 7.0.
The workflow for face retouching in Photoshop 7.0 typically starts with the Healing Brush set to a size slightly larger than the blemish being treated. Hold Alt and click on clean, undamaged skin near the target area to sample it, then click or paint over the blemish. For larger areas such as scars or uneven skin patches, switch to the Patch Tool, draw a freehand selection around the problem area, and drag it to a clean skin region that matches the texture.
- Healing Brush: intelligent pixel blending for invisible blemish removal
- Patch Tool: area-based healing for larger skin imperfections
- Clone Stamp: precise pixel copying for texture matching
- Dodge Tool: lighten dark circles under eyes and shadow areas
- Blur Tool: soften skin texture for smoother portrait look
- Sharpen Tool: enhance eye detail and hair definition
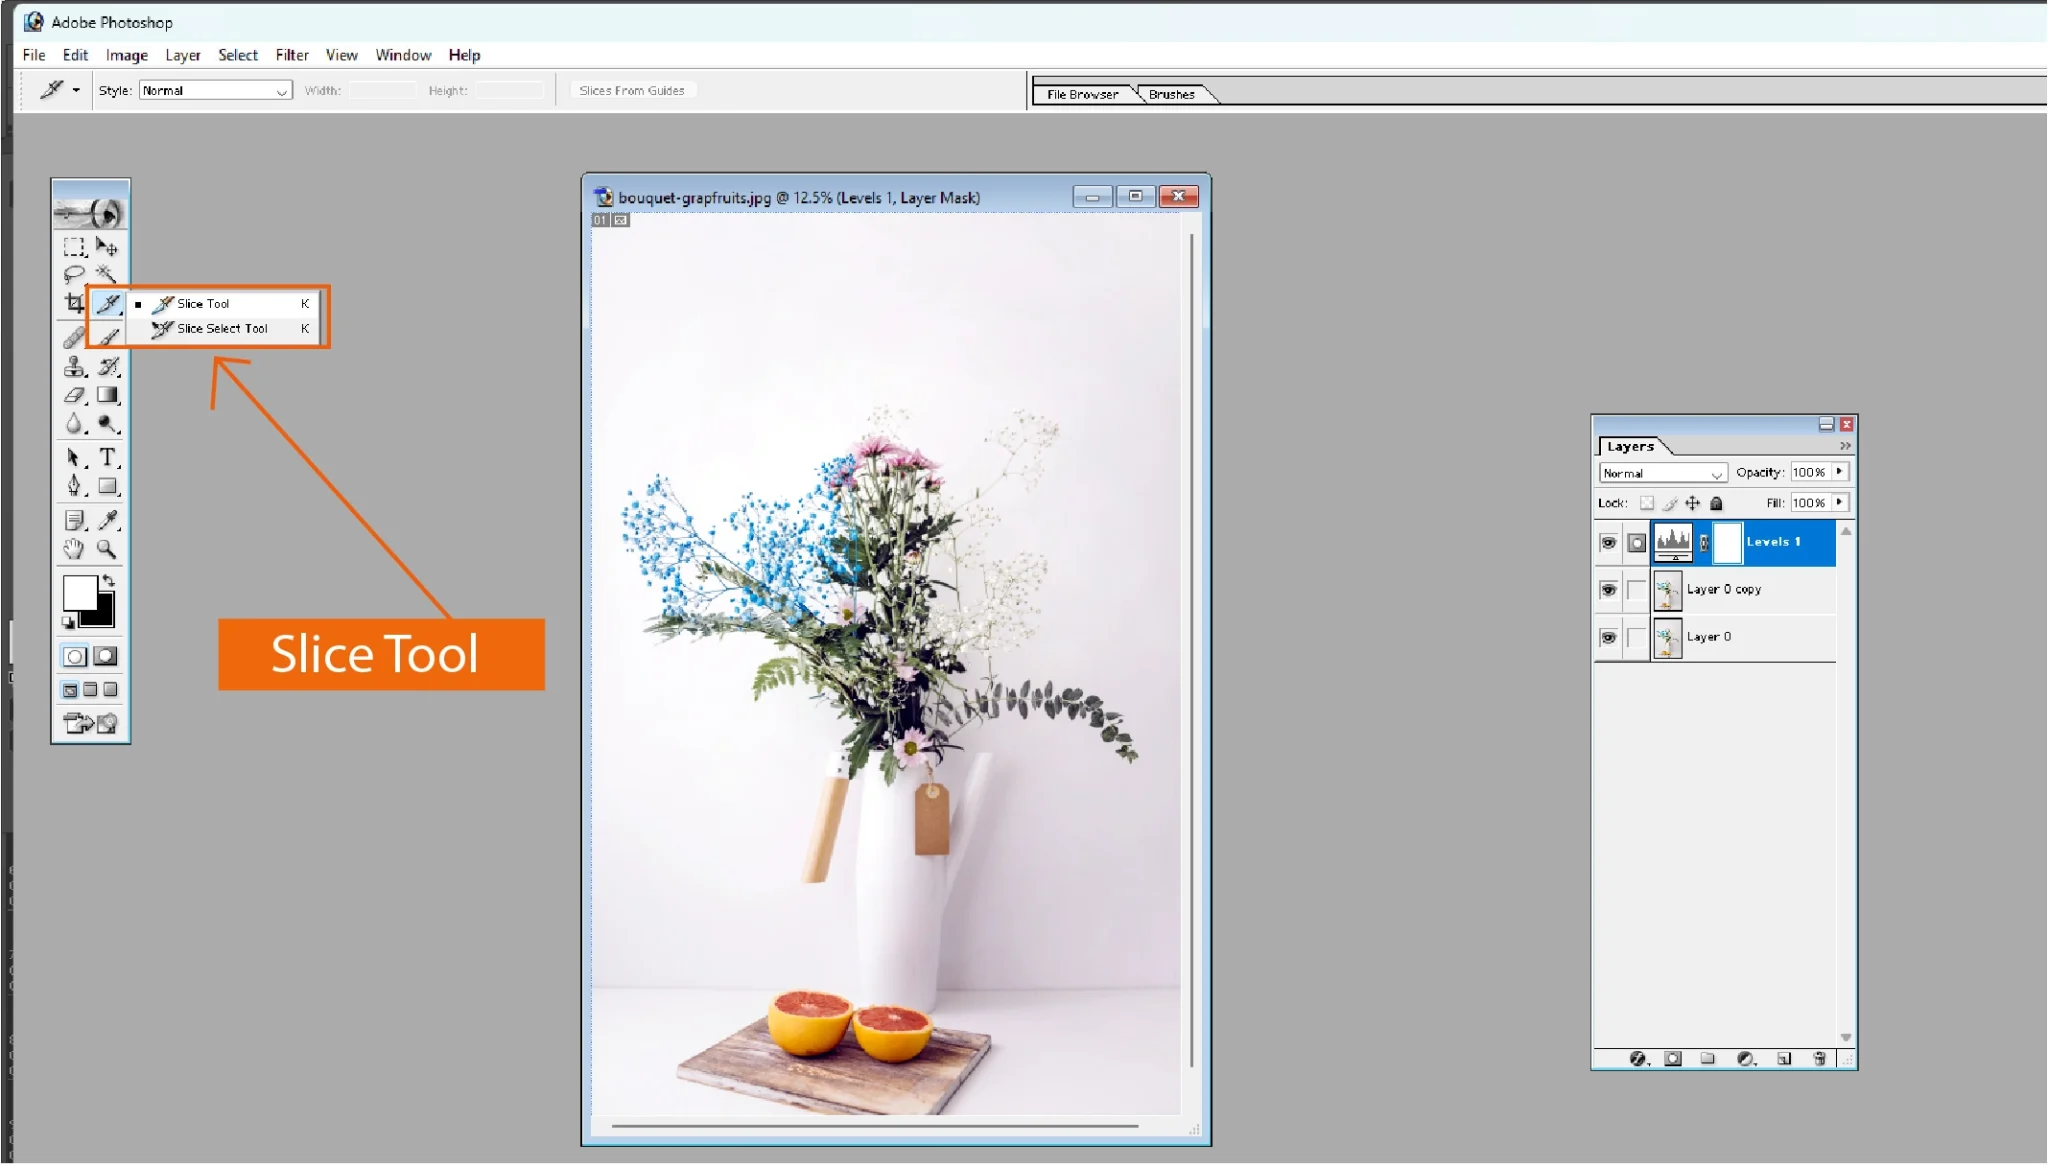
Slice Tool: Web Design and Image Export
The Slice Tool in Photoshop 7.0 was designed specifically for the web design production workflow of the early 2000s, when professional websites were designed entirely as Photoshop layouts and then sliced into individual image pieces for HTML assembly. The tool works by drawing rectangular slice boundaries over different regions of a design, with each slice becoming an independently exportable image element with its own file name, format, compression level, link URL, and alt text attribute for accessibility.
While the image-slicing workflow for website production has largely been replaced by CSS, SVG, and modern responsive design frameworks, the Slice Tool remains practically useful for creating precise exports of specific sections from complex multi-element compositions, cutting product images to exact pixel dimensions for e-commerce platforms, and generating image assets at specific sizes for presentations and documents.
- Slice Tool: draw freehand rectangular slice boundaries over any design
- Slice Select Tool: reposition, resize, merge, and delete individual slices
- Divide Slice: split any slice into a grid of equally sized sub-slices
- Save for Web: export all slices at once with per-slice format settings
- Supports JPEG, GIF, and PNG format with individual quality control per slice
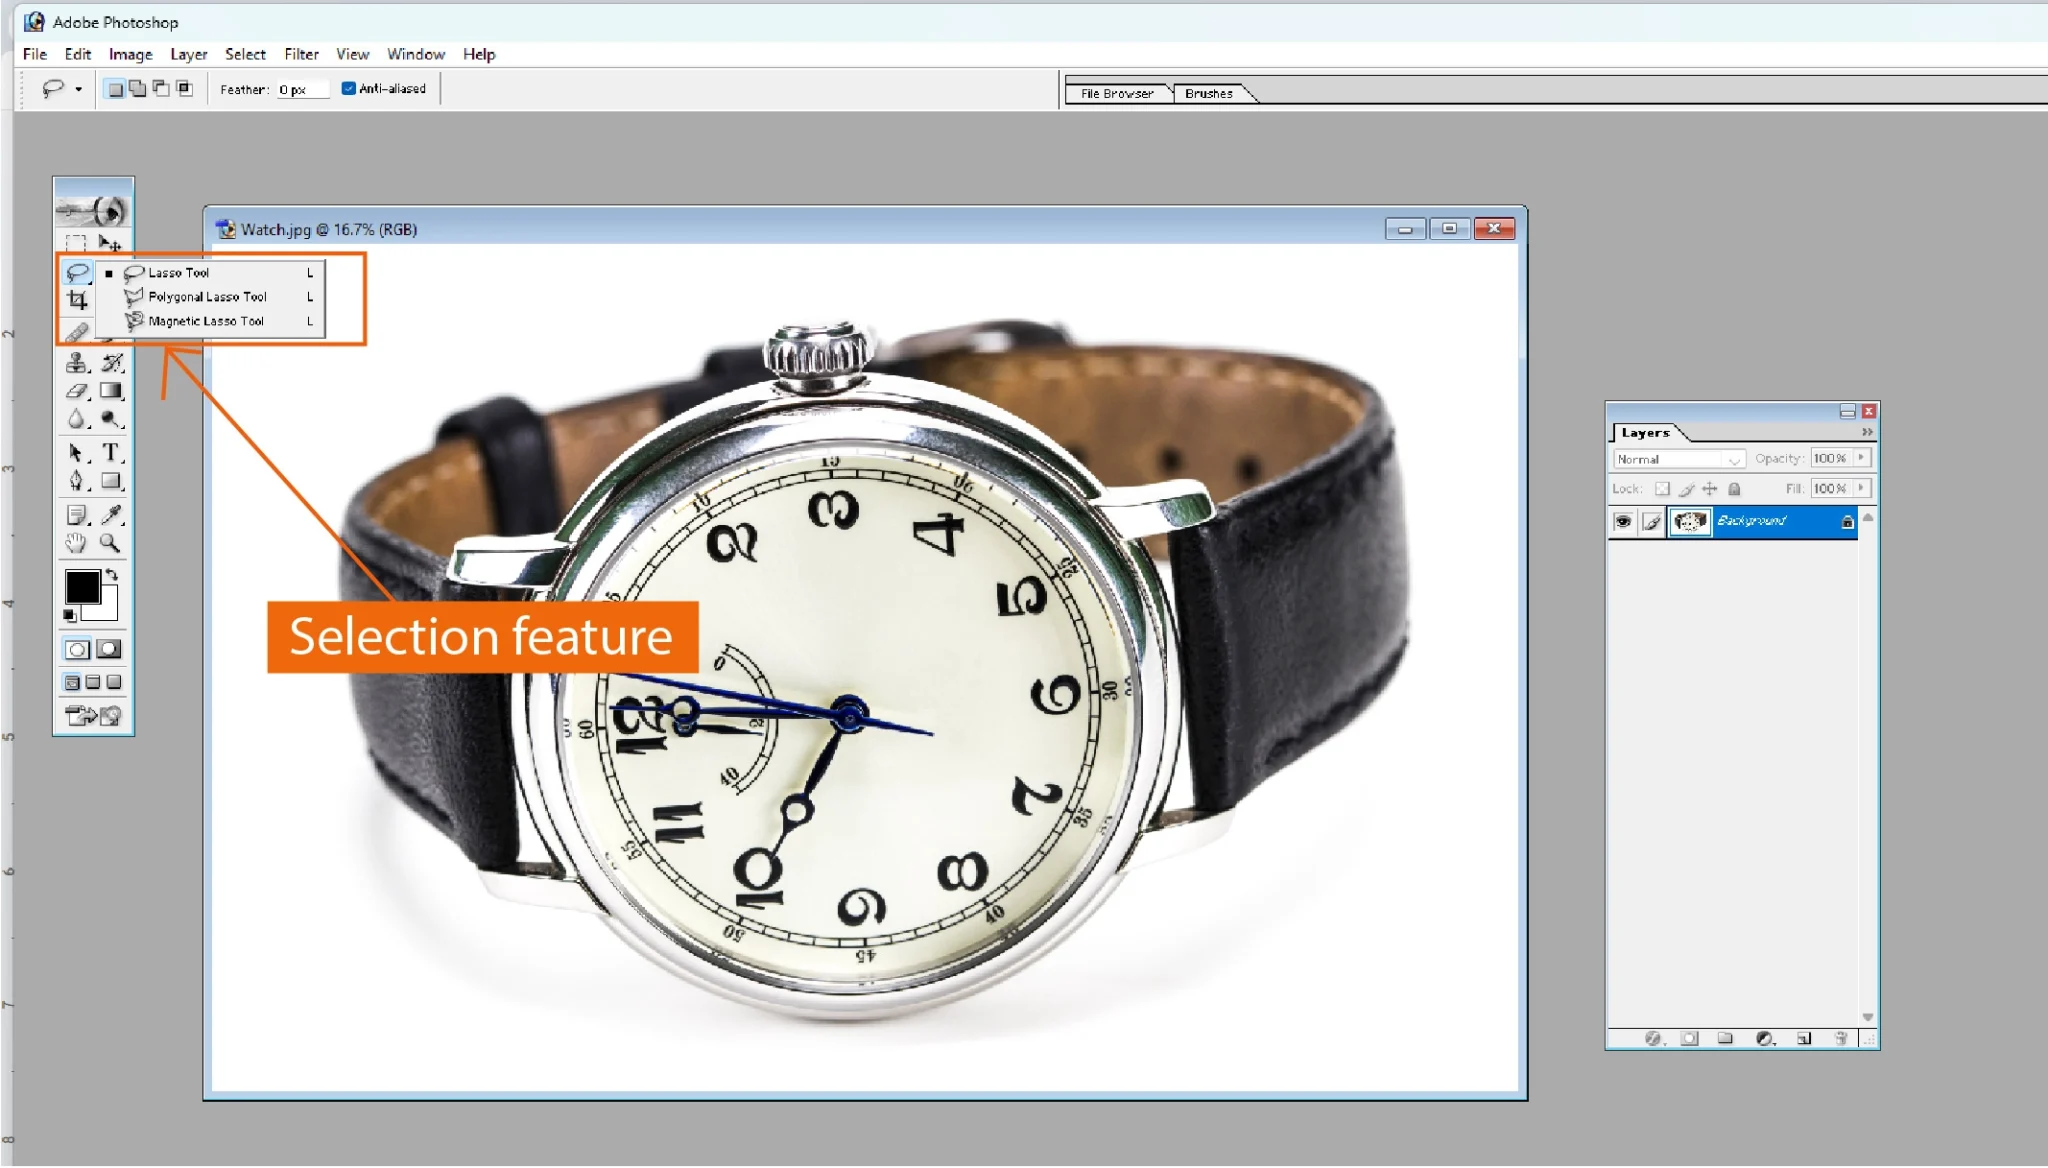
Selection Tools: The Foundation of All Editing
Selection is the absolute foundation of all Photoshop editing. When you activate a selection in Photoshop 7.0, every subsequent operation including painting, adjustments, filters, transformations, and deletions affects only the selected area while leaving the rest of the image untouched. Mastering the selection tools is therefore the single most important skill for anyone learning how to use Adobe Photoshop 7.0 for editing photos.
The Magic Wand Tool (keyboard shortcut W) selects all adjacent pixels within a specified colour similarity range, controlled by the Tolerance setting in the options bar. A Tolerance value of zero selects only pixels of the exact same colour, while a value of 255 selects the entire image. For background removal on images with a solid or near-solid colour background, start with a Tolerance of 30 to 40 and adjust from there. Hold Shift and click additional areas to add them to the selection, or hold Alt and click to remove areas from it.
- Magic Wand: colour-similarity selection, ideal for solid background removal
- Lasso: freehand selection by drawing around any shape
- Polygonal Lasso: click-to-point straight-line selections for angular shapes
- Magnetic Lasso: automatically snaps to detected edges as you trace
- Marquee Tools: precise rectangular and elliptical selections with pixel accuracy
- Feather: soften selection edges for natural blending with any adjustment
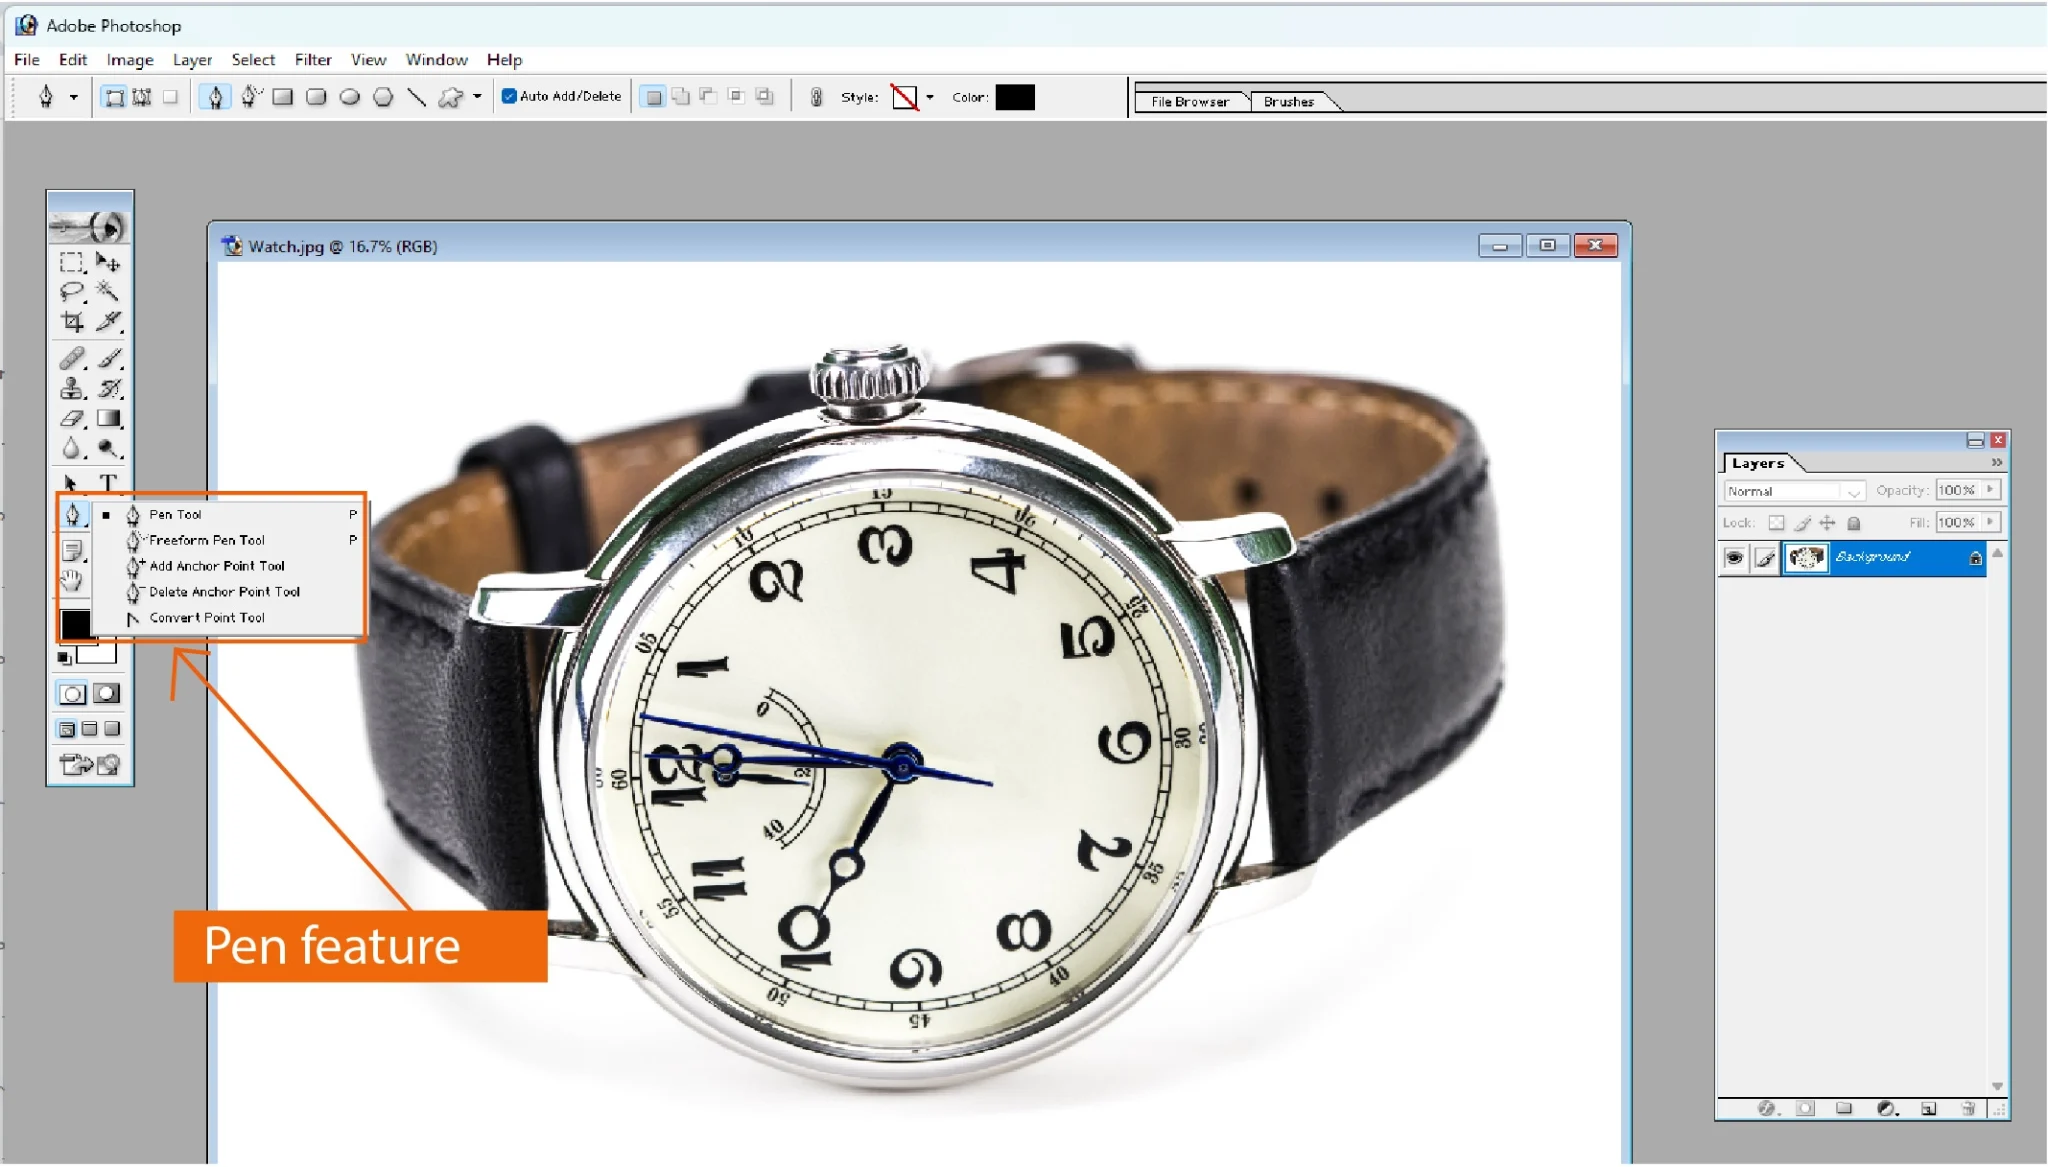
Pen Tool: Maximum Precision Paths and Masks
The Pen Tool in Photoshop 7.0 (keyboard shortcut P) is the most precise and professional selection and vector drawing tool in the application. It creates Bezier curve paths, which are smooth continuous curves defined by anchor points with direction handles that control the curvature of each segment. While the Pen Tool requires practice and patience to master, the quality of selections it produces exceeds every other selection method in the application for clean, sharp-edged cutouts on product photography, people, clothing, and any subject where edge quality is critical.
The basic workflow for the Pen Tool begins with clicking once to create a straight line anchor point. Click and drag instead to create a curved anchor point with two direction handles extending from it. Continue clicking and dragging around the subject's outline, and close the path by clicking on the very first anchor point when you have fully traced the shape. Then right-click on the path in the Work Paths panel and select Make Selection to convert the path into a pixel selection that can be used for editing, masking, or background removal.
- Click to create straight line anchor points for angular shapes
- Click and drag to create smooth curved anchor points with direction handles
- Right-click on any path to make a selection, create a vector mask, or fill with colour
- Direct Selection Tool (A) adjusts individual anchor points after the path is drawn
- Add Anchor Point and Delete Anchor Point tools for precise path refinement
- Convert Point Tool switches between sharp corner and smooth curve anchors
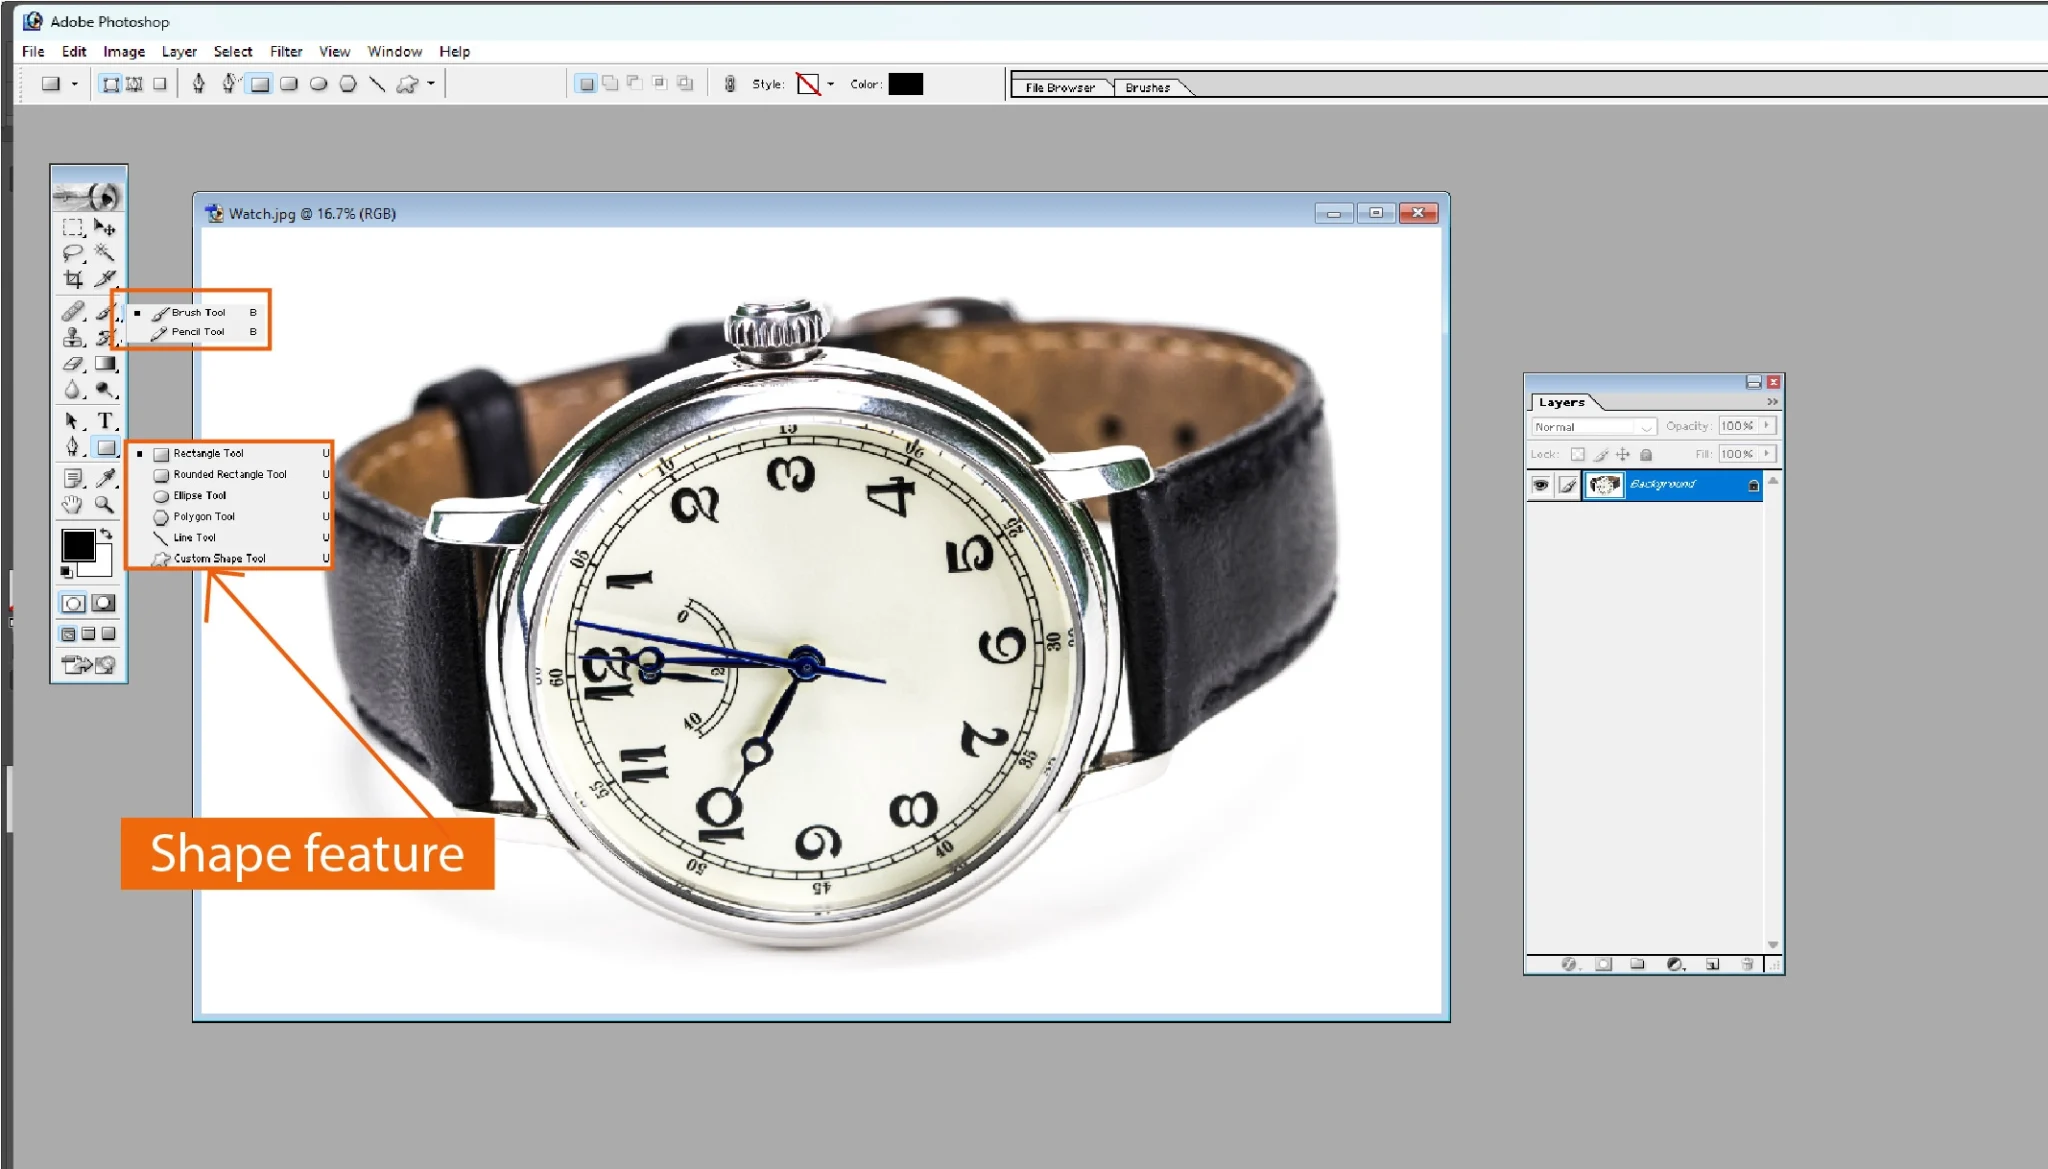
Shape Tool: Logos, Banners, and Graphic Design
The Shape Tool in Photoshop 7.0 is the primary tool for all graphic design work involving defined geometric and custom shapes. It creates resolution-independent vector shape layers that remain perfectly sharp at any print size or screen resolution, making it the correct choice for logos, visiting cards, brochures, posters, and banners rather than painting with pixel brushes that would become pixelated when the image is scaled up.
To design a logo in Adobe Photoshop 7.0 using the Shape Tool, begin by creating a new document at the target dimensions and a resolution of 300 PPI if the logo is intended for print. Select the Custom Shape Tool from the toolbar, choose a shape from the Shape picker in the options bar, and drag on the canvas while holding Shift to constrain the proportions. Apply colour through Layer Styles using the Color Overlay effect, add depth with Bevel and Emboss, and create a shadow with Drop Shadow. Text created with the Type Tool can be combined with shapes on separate layers and grouped together to form the complete logo composition.
- Rectangle and Rounded Rectangle: backgrounds, buttons, cards, and frames
- Ellipse Tool: circles, ovals, and organic shapes at any proportion
- Polygon Tool: stars, triangles, hexagons, and any regular polygon
- Custom Shape: hundreds of preset ornamental and functional shapes
- Combine shapes on layers with Layer Styles for professional finish
- Hold Shift while drawing to constrain to perfect squares and circles
How to Download and Install Adobe Photoshop 7.0
Complete verified installation guide for Windows 10, Windows 11, Windows 7, and laptop installation with solutions to the most common errors
Adobe Photoshop 7.0 is no longer officially available for purchase from Adobe's website. Preservation copies are available through the Internet Archive as part of legitimate software preservation efforts. We do not host any installer files or serial numbers on this site. Always scan downloaded files with up-to-date antivirus software before running them. Do not download from sites offering cracked versions or keygens as these contain malware in virtually every documented case.
How to Download Adobe Photoshop 7.0
Visit a Legitimate Preservation Source
Navigate to our dedicated Download Guide page which documents the safest and most reliable legitimate sources for obtaining Adobe Photoshop 7.0 in 2026. The Internet Archive at archive.org is the primary preservation source and the only one we recommend as a starting point. Avoid any site that requires you to create an account, install a download manager, or complete surveys before providing the file.
Choose the Correct Version for Your Operating System
Photoshop 7.0 was released as both a Windows version and a Mac OS version. If you are running Windows 10 or Windows 11 in 64-bit mode, download the standard Windows installer. If you want to install Adobe Photoshop 7.0 on a 64-bit system, the 32-bit installer will still work through Windows on Windows 64 compatibility. Verify your file size is approximately 173 MB before installing, as any installer significantly larger than this has likely been modified and may contain additional unwanted software.
Verify File Integrity and Scan for Malware
Once the installer download is complete, right-click the file and select Scan with Windows Defender or your installed antivirus application. Do not proceed if any threat is detected. Legitimate Photoshop 7.0 installer files from the Internet Archive are clean and will not trigger false positives on standard antivirus definitions. The correct file extension is .exe for the Windows version.
How to Install Adobe Photoshop 7.0 in Windows 10
Run the Installer as Administrator
Right-click the downloaded installer .exe file and select Run as Administrator from the context menu. Running without administrator privileges is the most common reason the Photoshop 7.0 installer fails silently without displaying any error message. Administrator rights are required for Photoshop to write files to the Program Files directory and create the necessary Windows Registry entries for proper application function.
Follow the Installation Wizard
The installer will display the Adobe license agreement, which you must accept to proceed. Choose an installation directory when prompted. The default path of C:\Program Files\Adobe\Photoshop 7.0 is recommended unless you have a specific reason to change it. The installation progress bar takes approximately two to four minutes to complete depending on your storage drive speed. Do not close the installer or allow your computer to sleep during this process.
Enter the Serial Number When Prompted
During installation the setup wizard will ask for a valid serial number to register and activate the software. If you own a legitimate purchased copy of Photoshop 7.0, the serial number is printed on the original CD case or envelope packaging. If you downloaded a preservation copy, consult the accompanying documentation. We do not provide serial numbers and strongly advise against using randomly sourced serial numbers from websites as this is both illegal under copyright law and technically unreliable.
Configure Compatibility Mode for Windows 10 and 11
After installation completes, locate the Adobe Photoshop 7.0 shortcut on your desktop. Right-click the shortcut and select Properties from the context menu. Click the Compatibility tab at the top of the Properties window. Check the box labeled Run this program in compatibility mode for and select Windows XP Service Pack 3 from the dropdown menu. Also check the box labeled Run this program as an administrator. Click Apply and then OK to save these settings before launching Photoshop for the first time.
Configure Preferences on First Launch
Double-click the Photoshop 7.0 shortcut to launch it. On first launch you may see a warning about the graphics driver or the scratch disk. Click Continue or OK to proceed. Once Photoshop has loaded, go to Edit then Preferences then Memory and Image Cache and set the percentage of RAM allocated to Photoshop to 70 percent of your available RAM for best performance on modern hardware. Set the History States value to 50 or higher in the General preferences to give yourself more undo steps.
How to Install Adobe Photoshop 7.0 in Windows 7 and Windows 11
Installing Photoshop 7.0 on Windows 7 requires no compatibility mode configuration because Windows 7 shares sufficient architectural compatibility with Windows XP for the installer and application to run normally. Simply run the installer as administrator and Photoshop 7.0 will install and function correctly on Windows 7 without any additional steps.
For Windows 11, the compatibility mode process is identical to Windows 10 as described above. Right-click the desktop shortcut, select Properties, go to the Compatibility tab, select Windows XP SP3, and enable Run as administrator. On Windows 11 systems with very high DPI displays such as 4K monitors, you may additionally need to click the Change high DPI settings button in the Compatibility tab and set Override high DPI scaling behavior to Application to prevent Photoshop from appearing blurry or scaled incorrectly.
How to Install Adobe Photoshop 7.0 in Laptop
The process of installing Adobe Photoshop 7.0 on a laptop is completely identical to the desktop installation process described above. Every laptop made after 2008 easily exceeds the minimum system requirements of Photoshop 7.0 by a large margin. The only laptop-specific consideration is display DPI scaling on modern laptops with high-resolution screens, which is addressed by the Change high DPI settings step described for Windows 11 above. Laptops running Windows 10 or 11 should follow the compatibility mode steps exactly as described for the desktop installation.
We have dedicated installation pages covering every common Windows scenario. Visit the Windows 10 install guide, the Windows 11 install guide, and the 64-bit installation guide for full step-by-step instructions with screenshots and solutions to every documented installation error.
How to Edit Photos in Adobe Photoshop 7.0: 200+ Questions Answered
Covering every common how-to question about photo editing, tools, design work, and advanced techniques in Photoshop 7.0
Photo Editing and Retouching
How to remove background in Adobe Photoshop 7.0
Select the Magic Wand Tool by pressing W on the keyboard. Set Tolerance to 30 in the options bar and click on the background area. Hold Shift and click any remaining background areas to add them to the selection. Press Delete to remove the selected background. For complex edges with hair or fur, use the Magnetic Lasso Tool to trace around the subject edges more precisely. Save the file as PNG to preserve the transparent background.
How to remove pimples in Adobe Photoshop 7.0
Select the Healing Brush Tool by pressing J. Set the brush size to slightly larger than the pimple. Hold Alt and click on clean skin immediately adjacent to the blemish to sample clean texture. Release Alt and click directly on the pimple. The Healing Brush will blend the sampled clean skin seamlessly with the surrounding area. For multiple pimples, re-sample from a fresh clean area periodically to avoid repeating texture patterns.
How to clean face in Adobe Photoshop 7.0
Duplicate the background layer first by pressing Ctrl and J. Use the Healing Brush Tool for individual blemishes and the Patch Tool for larger uneven areas. For overall skin smoothing, apply Filter then Blur then Gaussian Blur at a radius of 2 to 4 pixels on a duplicate layer, then reduce the layer opacity to 40 to 60 percent so the skin texture remains visible beneath. This blends the smoothing effect naturally with the original detail.
How to remove dark circles in Adobe Photoshop 7.0
Use the Lasso Tool to make a loose selection around the dark area under one eye. Apply a feather of 10 to 15 pixels through Select then Feather to ensure the correction blends with no visible edge. Go to Image then Adjustments then Curves and pull the curve upward gently in the midtones to brighten the area. Alternatively use the Dodge Tool set to Midtones at 15 percent exposure and paint gently over the dark circles to gradually lighten them.
How to smooth skin in Adobe Photoshop 7.0
Duplicate the background layer (Ctrl and J). On the duplicate layer apply Filter then Blur then Gaussian Blur at a 3 pixel radius. Hold Alt and click the Layer Mask button to add a black mask that hides the blur effect completely. Then use a soft white brush set to 50 percent opacity and paint over the skin areas where you want the softening applied, revealing the blurred layer selectively only on the skin while preserving sharp detail on the eyes, eyebrows, lips, and hair.
How to make face white in Adobe Photoshop 7.0
Select the face area using the Lasso Tool with a 5 pixel feather applied. Go to Image then Adjustments then Hue and Saturation. Move the Lightness slider gently to the right by 10 to 20 points to brighten the skin tone. For desaturating slightly to achieve a fair skin effect, also move the Saturation slider left by 10 to 15 points. Check the result and adjust until the skin tone looks naturally brightened rather than blown out or unreal.
How to blur background in Adobe Photoshop 7.0
Select the subject using the Lasso, Magic Wand, or Pen Tool. Invert the selection by pressing Ctrl, Shift, and I together so the background is selected instead. Apply a feather of 2 pixels through Select then Feather. Go to Filter then Blur then Gaussian Blur and set the radius between 5 and 20 pixels depending on how strong a background blur effect you want. Press Ctrl and D to deselect. This simulates shallow depth of field from a fast portrait lens.
How to swap face in Adobe Photoshop 7.0
Open both the source and target images. In the source image, use the Lasso Tool to select the face area. Copy with Ctrl and C. Switch to the target image and paste with Ctrl and V. Use Edit then Free Transform (Ctrl and T) to resize and reposition the pasted face until it aligns with the face in the target image. Reduce the pasted layer opacity to about 50 percent to use the underlying face as a positioning guide. Return opacity to 100 percent when aligned, then use the Eraser Tool to blend the edges smoothly.
How to change hair colour in Adobe Photoshop 7.0
Use the Lasso Tool to select all hair areas, adding multiple areas to the selection while holding Shift. Apply a feather of 2 to 3 pixels for natural edges. Go to Image then Adjustments then Hue and Saturation. Check the Colorize checkbox and use the Hue slider to select your target hair colour. Adjust the Saturation slider for colour intensity and the Lightness slider to darken or brighten the result. Natural-looking hair colour changes require reducing saturation to about 30 to 50 rather than leaving it at the default high value.
How to change dress colour in Adobe Photoshop 7.0
Select the clothing area using the Magic Wand for solid colours or the Lasso Tool for complex shapes. Feather the selection by 1 to 2 pixels. Go to Image then Adjustments then Hue and Saturation. Move the Hue slider to shift the colour of the clothing to any other colour while preserving the original lighting, shadows, and texture. For very precise colour targeting of a specific garment colour, click the dropdown that says Master and select the specific colour range closest to the original garment colour before adjusting.
How to adjust brightness in Adobe Photoshop 7.0
Go to Image then Adjustments then Brightness and Contrast for the simplest brightness control. Move the Brightness slider right to increase brightness and left to darken. For more precise professional-level brightness control, use Image then Adjustments then Curves and click on the diagonal line to add control points, then drag them upward to increase brightness in that tonal range. The upper right of the curve controls highlights and the lower left controls shadows, giving you independent control of each tonal zone.
How to increase brightness in Adobe Photoshop 7.0
Open the image and go to Image then Adjustments then Levels. The Levels dialogue shows the histogram of your image. Drag the white point Input slider on the right side of the histogram leftward toward where the bright pixels actually begin. Then drag the midtone grey slider in the middle to the left to increase overall brightness without clipping the highlights. Alternatively use Ctrl and L as the keyboard shortcut to open Levels directly without navigating the menu.
How to remove pimple marks in Adobe Photoshop 7.0
For redness and discoloration left by pimple marks, use Image then Adjustments then Hue and Saturation, select the Reds colour range from the dropdown, and reduce saturation to desaturate the red marks. Then use the Healing Brush to address any remaining texture differences. For deep acne scars with texture, use the Clone Stamp Tool set to a very small size to copy smooth skin texture over the scarred area pixel by pixel from a nearby undamaged skin region.
How to make skin fair in Adobe Photoshop 7.0
Select the skin areas using the Lasso Tool with Shift held to add multiple areas. Apply a 5 pixel feather. Go to Image then Adjustments then Selective Color. In the Selective Color dialogue, choose Reds or Yellows from the colour dropdown depending on the skin tone, and reduce Cyan while increasing White to achieve a fairer, cooler skin tone. Combine this with a gentle Curves adjustment brightening the midtones for a complete skin lightening effect that still looks photographically natural.
How to make face glow in Adobe Photoshop 7.0
Duplicate the background layer and apply Filter then Blur then Gaussian Blur at 8 to 12 pixels radius on the duplicate. Set the duplicate layer blend mode to Screen from the Layers panel dropdown. This creates a glowing luminous halo effect over the face. Reduce the layer opacity to 40 to 60 percent for a subtle natural glow, or keep it higher for a stronger editorial beauty effect. Add a Hue and Saturation adjustment to warm the glow layer by moving the Hue slider slightly toward the yellow-orange range.
How to remove watermark in Adobe Photoshop 7.0
The approach depends on the watermark style. For a text watermark over a plain background, use the Magic Wand to select the watermark text area, then apply the Patch Tool to drag clean background over the selected area. For semi-transparent watermarks over complex content, use the Clone Stamp Tool to carefully paint matching content over the watermark area pixel by pixel, sampling from immediately adjacent undamaged areas of the image. This requires patience but produces clean results on most common watermark placements.
Design and Creative Tasks
How to design a logo in Adobe Photoshop 7.0
Create a new document at 1000 by 1000 pixels at 300 PPI for a print-quality logo. Use the Shape Tool to create the base geometric shapes of the logo on separate layers. Add company name text using the Type Tool with a professional font. Apply Layer Styles including Color Overlay for flat colour, Gradient Overlay for metallic or gradient effects, and Drop Shadow for depth. Group all logo layers by selecting them and pressing Ctrl and G, then save the complete PSD file. For web use, flatten and export as PNG with a transparent background.
How to make a banner in Adobe Photoshop 7.0
Create a new document at your target banner dimensions, for example 728 by 90 pixels for a standard web leaderboard or 1200 by 628 pixels for a social media cover. Add a background using the Rectangle Shape Tool with a colour or gradient fill via Layer Styles. Import any product images by dragging them from the File Browser and positioning with Free Transform. Add headline text with the Type Tool and apply Drop Shadow for visibility. Use Save for Web (Ctrl, Alt, Shift, and S) to export the banner as a compressed JPEG or GIF optimised for the web.
How to make a visiting card in Adobe Photoshop 7.0
Create a new document at the standard business card dimensions of 3.5 by 2 inches at 300 PPI resolution. Design the front face with the company logo, name, job title, and contact information using the Type Tool on separate text layers. Add decorative elements with the Shape Tool and any imported images. Save the PSD file as the master. For print production, go to File then Save As and choose TIFF or PDF format at 300 PPI. Print at the card dimensions on a photo printer or send the TIFF file to a print shop.
How to design a poster in Adobe Photoshop 7.0
Create a new document at your poster dimensions such as A4 (2480 by 3508 pixels at 300 PPI) or custom. Start with a background layer using a solid colour, gradient, or imported background image. Add the main visual element, for example a product photo or portrait, and remove any unwanted background. Layer typographic elements including headline, subheading, and body text using the Type Tool. Apply Layer Styles for visual effects and use adjustment layers or Image Adjustments to colour-match all elements. Save as PSD and export as PDF or TIFF for the printer.
How to make a brochure in Adobe Photoshop 7.0
Design each panel of the brochure as a separate PSD document at the panel dimensions (for a trifold A4 brochure, each panel is approximately 99 by 210 mm at 300 PPI). Alternatively design the full spread as a single wide document and use guides to mark the fold lines. Add your company logo, photography, text columns, and decorative elements on separate layers. Save each panel as a high-resolution PDF or TIFF for the print shop. Include bleed of 3 mm on each outer edge of the design.
How to make a collage in Adobe Photoshop 7.0
Create a new blank document at your desired output dimensions. Open each photo you want to include in the collage. Select all pixels in each source image with Ctrl and A, copy with Ctrl and C, then paste into the collage document with Ctrl and V. Each pasted image becomes its own layer. Use Edit then Free Transform (Ctrl and T) to resize and rotate each layer to position it in the composition. Adjust the opacity of each layer if you want overlapping transparency effects. Add border strokes using Layer Styles for a polished photo collage look.
How to make a photo album in Adobe Photoshop 7.0
Create a new document at the album page size such as 12 by 8 inches at 300 PPI. Design the background with a decorative texture or solid colour. Place each photo by opening it in Photoshop, selecting all and copying, then pasting into the album page. Use Free Transform to size and position each photo. Add a white border effect to photos by selecting the photo layer, going to Layer Styles, and applying a white Stroke of 10 to 15 pixels. Add captions with the Type Tool. Flatten and save each completed page as a high-resolution JPEG for printing.
How to make a GIF animation in Adobe Photoshop 7.0
Photoshop 7.0 supports basic GIF animation through the ImageReady companion application that installs alongside it. Click the Jump to ImageReady button at the bottom of the Photoshop toolbox to open ImageReady. In ImageReady, each layer in the Layers panel can become one frame of the animation. Open the Animation panel from Window then Animation. Create new frames by clicking the New Frame button, then show or hide different layers to define what appears in each frame. Set the delay time for each frame in seconds. Go to File then Save Optimized As and choose GIF to export the animation.
How to create animation in Adobe Photoshop 7.0
All animation capabilities in Photoshop 7.0 are handled through the bundled ImageReady application rather than directly in Photoshop. Design each frame state as separate layers in your Photoshop document, then click the ImageReady button at the bottom of the toolbox to transfer the document. In ImageReady, build the animation frame by frame using the Animation panel, control which layers are visible in each frame, set timing delays, and choose looping options. Export as animated GIF, which is the only animation format supported by this version.
How to make 3D text in Adobe Photoshop 7.0
Photoshop 7.0 does not have native 3D rendering capability, but convincing 3D text effects can be created with layer duplication. Type your text with the Type Tool and rasterize the layer through Layer then Rasterize then Type. Duplicate this layer 15 to 20 times using Ctrl and J. Select all duplicates, link them together, and nudge them diagonally down and to the right by one pixel each using the arrow keys. Merge all the duplicated layers to form the 3D body, then apply a darker colour fill to this merged layer. Position the original text layer on top with the final colour to create the 3D extrusion effect.
How to make a passport photo in Adobe Photoshop 7.0
Create a new document at 51 by 51 millimetres at 300 PPI resolution, which is the standard passport photo size in most countries. Open your portrait photo, use the Lasso or Pen Tool to select the head and shoulders area, and copy and paste it into the passport document. Use Edit then Free Transform to scale the head so it fills 70 to 80 percent of the frame height. Add a plain white or off-white background below the subject layer. Crop to exact dimensions using the Crop Tool with specific pixel dimensions entered in the options bar. Print at actual size on 10 by 15 cm photo paper to get two copies per page.
How to merge two photos in Adobe Photoshop 7.0
Open the first image. Go to Image then Canvas Size and increase the width to double the current width to create space for the second image beside the first. Open the second image, select all with Ctrl and A, copy with Ctrl and C, then close it. Return to the first image and paste with Ctrl and V. The second image appears as a new layer. Use the Move Tool to position it in the empty canvas space beside the first. Flatten the image through Layer then Flatten Image and save the combined result. This is the same process used for joining two portrait photos side by side for comparison.
How to merge two images in Adobe Photoshop 7.0
For a blended composite merge rather than a side-by-side join, paste the second image on top of the first as a new layer. Add a Layer Mask to the top layer by clicking the Layer Mask button at the bottom of the Layers panel. Select a large soft brush set to black colour and paint across the join area of the mask. Where you paint black on the mask the top layer becomes transparent, revealing the layer beneath. This creates a smooth, natural-looking blend transition between the two images rather than a hard edge at the join point.
How to cut a photo in Adobe Photoshop 7.0
To cut out a subject from a background, first select the subject using the best appropriate selection tool for that subject type. For people against plain backgrounds, the Magic Wand selecting the background then inverting the selection (Ctrl, Shift, I) works well. For complex subjects, trace with the Pen Tool. Once the subject is selected, go to Layer then New then Layer via Cut to extract the subject to its own new layer while removing it from the original layer. Alternatively press Ctrl and X to cut the selected area entirely or Ctrl and C to copy it while keeping the original.
How to make a frame in Adobe Photoshop 7.0
Open the image you want to frame. Create a new layer above the image layer. Select all with Ctrl and A to get the full canvas selection. Go to Select then Modify then Border and enter a value between 20 and 60 pixels for the frame width. Fill the selection with your chosen frame colour using Edit then Fill then choose Foreground Color. Apply a Layer Style such as Bevel and Emboss with the Chisel Soft technique to give the frame a three-dimensional raised appearance. Add a complementary inner stroke using the Layer Style Stroke option for a finished double-border frame effect.
How to add a border in Adobe Photoshop 7.0
The quickest method is to select the image layer and apply a Stroke Layer Style through Layer then Layer Style then Stroke. Set the stroke size, position (Inside, Center, or Outside the layer boundary), and colour. For a border that appears around the entire canvas including the background, go to Image then Canvas Size, check Relative, enter the pixel dimensions you want added around all four sides, and click OK. The canvas expands with the current background colour filling the new area, which becomes the visible border.
Tools and Techniques
How to use the gradient tool in Adobe Photoshop 7.0
Select the Gradient Tool by pressing G on the keyboard. Choose a gradient preset from the options bar by clicking on the gradient preview thumbnail. Select the gradient type from the five icons in the options bar: Linear, Radial, Angle, Reflected, or Diamond. Set the blend mode and opacity. Click on the canvas at your starting point and drag to the end point, then release the mouse button. The gradient fills from the foreground colour to the background colour along the direction you dragged. For custom gradients, double-click the gradient thumbnail to open the Gradient Editor where you can add, remove, and colour-adjust gradient stops.
How to crop in Adobe Photoshop 7.0
Select the Crop Tool by pressing C on the keyboard. For a freehand crop, simply drag a rectangle over the area you want to keep, adjust the handles at the corners and edges, and press Enter or Return to apply. For precise dimensions, type the exact width and height in the options bar fields before dragging on the canvas, which constrains the crop to those exact proportions. The Shield option in the options bar displays a darkened overlay outside the crop area to help you visualise the final result before committing. Press Escape to cancel the crop without applying it.
How to rotate image in Adobe Photoshop 7.0
To rotate the entire image canvas, go to Image then Rotate Canvas and choose from 180 degrees, 90 degrees clockwise, 90 degrees counter-clockwise, Arbitrary for a specific angle, or Flip Canvas Horizontal and Vertical. For rotating a single layer rather than the entire canvas, select the layer in the Layers panel and go to Edit then Free Transform (Ctrl and T). Position the cursor just outside a corner handle until it changes to a curved double arrow, then click and drag to rotate the layer to any angle. Hold Shift while dragging to constrain rotation to 15-degree increments.
How to resize photo in Adobe Photoshop 7.0
Go to Image then Image Size (Alt, Ctrl, and I keyboard shortcut). Ensure the Constrain Proportions checkbox is ticked to prevent distortion when changing only one dimension. Change the width or height in pixels, inches, or centimetres as required. For web output set the resolution to 72 PPI. For high-quality print output set the resolution to 300 PPI. Click OK to apply the resize. For resizing without altering the canvas size, use Edit then Free Transform on a specific layer instead.
How to reduce image size in Adobe Photoshop 7.0
Image size reduction in Photoshop 7.0 can mean reducing either the pixel dimensions or the file size. To reduce pixel dimensions, use Image then Image Size and enter smaller width and height values. To reduce file size while keeping the same dimensions, use File then Save for Web and adjust the JPEG quality slider. Reducing JPEG quality from 100 to 60 typically reduces file size by 70 to 80 percent with minimal visible quality loss. For the smallest file size at acceptable quality for web use, a JPEG quality setting of 60 to 70 is generally the best balance.
How to resize image in Adobe Photoshop 7.0 without distortion
When resizing an image, always ensure the Constrain Proportions option is checked in the Image Size dialogue. This links the width and height fields so changing one automatically changes the other to maintain the original aspect ratio. If you need to resize to specific dimensions that do not match the original aspect ratio, crop the image first to the required proportions before resizing. Use the Crop Tool with specific width and height entered in the options bar to crop to the exact target aspect ratio, then resize with Image Size.
How to add text in Adobe Photoshop 7.0
Select the Type Tool by pressing T. Click once on the canvas to create a point text layer for a single line of text, or click and drag to create a text box for paragraph text that wraps automatically. Type your text. Use the Character palette (open from Window then Character) to set the font family, font style, font size, leading between lines, tracking between letters, kerning between specific letter pairs, and vertical and horizontal scaling. Use the Paragraph palette for alignment, indentation, and spacing. Press Ctrl and Enter to commit the text and deselect the text layer.
How to highlight text in Adobe Photoshop 7.0
Photoshop 7.0 does not have a built-in text highlight tool in the way word processors do. To create a highlighted text effect, add a new layer below your text layer. Use the Rectangle Marquee Tool to draw a selection across the text and fill it with the highlight colour (yellow, for example) using Edit then Fill. Alternatively apply a Color Overlay or Gradient Overlay Layer Style directly to the text layer to change the text colour itself. For a glow or backlight highlight effect behind text, use Outer Glow in the Layer Styles dialogue.
How to write Hindi in Adobe Photoshop 7.0
Install a Hindi Unicode font such as Mangal, Aparajita, or Kokila if not already present on your Windows system. Add the Hindi Indic Input language to Windows through Control Panel then Regional and Language Options then Languages. Select the Type Tool in Photoshop, click on the canvas, and switch your keyboard input to Hindi using the Windows language switcher (Windows key and Space bar). Select the installed Hindi font in the Character palette. Type using the Indic keyboard layout and the text will appear in Devanagari script in your Photoshop document.
How to write Bangla in Adobe Photoshop 7.0
Install a Bangla Unicode font such as Vrinda, SolaimanLipi, or Kalpurush. Add Bengali as a keyboard input language in Windows through Control Panel then Regional and Language Options. In Photoshop, select the Type Tool and switch the keyboard to Bengali input. Choose the installed Bangla font from the Character palette. Type your Bangla text and it will render correctly in the Photoshop canvas. For more advanced Bangla text layouts including complex conjuncts, third-party Bangla font software like Bijoy may offer better rendering through copy-paste into Photoshop.
How to write Punjabi in Adobe Photoshop 7.0
Install a Gurmukhi Unicode font such as Raavi or the Punjabi fonts bundled with Windows. Add Punjabi as a keyboard input language in Windows language settings. Select the Type Tool in Photoshop and choose the Gurmukhi font from the Character palette. Switch to the Punjabi keyboard using the Windows language bar and type your text. The Gurmukhi script will render in the Photoshop text layer. Press Ctrl and Enter when done to commit the text layer. Gurmukhi text in Photoshop requires a Unicode-compatible font for correct rendering.
How to write Tamil in Adobe Photoshop 7.0
Install a Tamil Unicode font such as Latha, Vijaya, or Tamil Sangam MN. Add Tamil as an input language in Windows through Regional and Language Options. In Photoshop, select the Type Tool, choose the Tamil font, and type using the Tamil keyboard layout. Tamil text is a complex script with many ligature combinations, so ensure you are using a properly designed Tamil Unicode font that includes all the necessary conjunct character combinations for accurate rendering of your text within the Photoshop document.
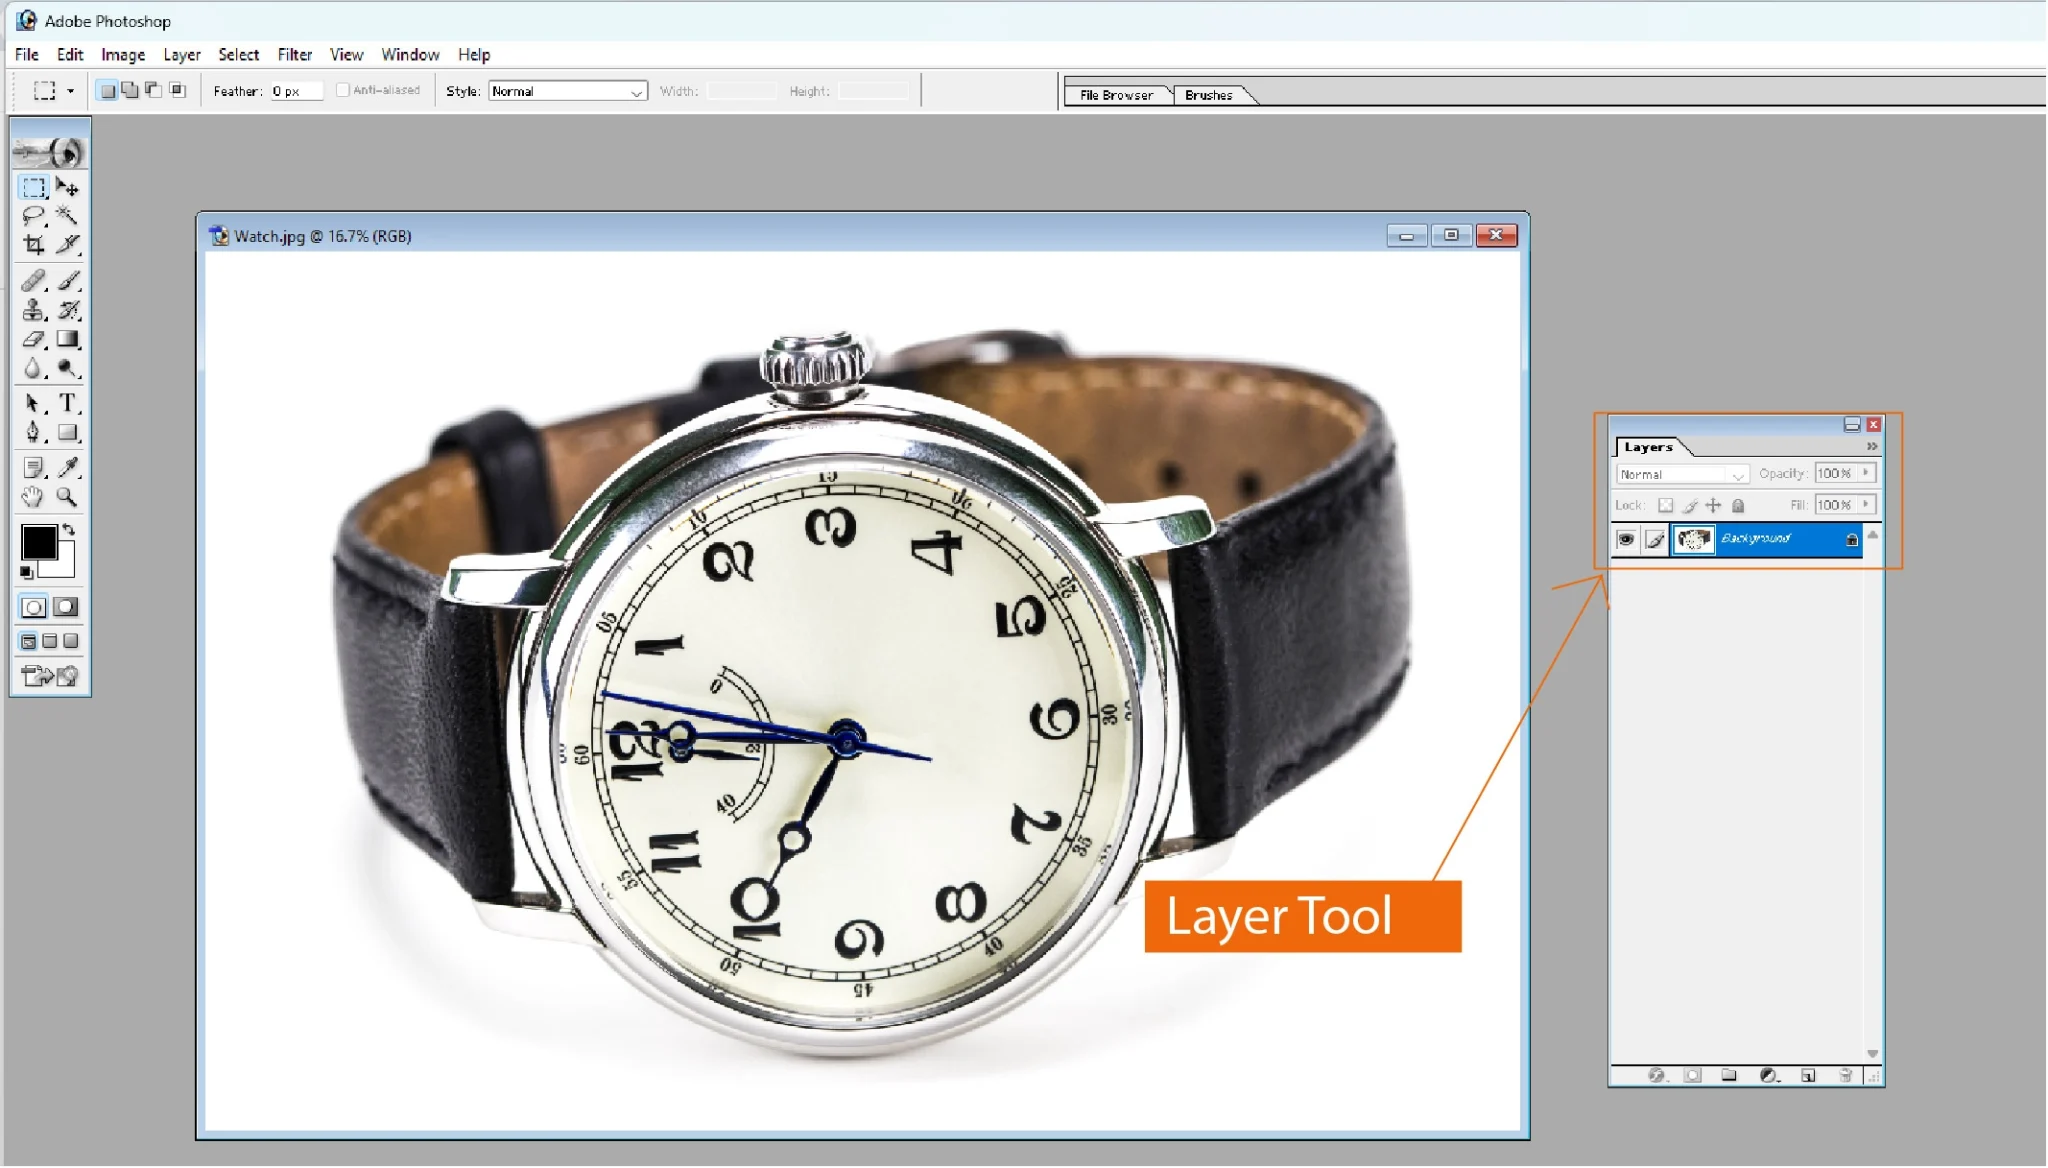
How to unlock a layer in Adobe Photoshop 7.0
When you open a JPEG or any flattened image file in Photoshop 7.0, the single layer is named Background and appears with a padlock icon indicating it is locked. To unlock it, simply double-click the thumbnail of the Background layer in the Layers panel. A dialogue box appears asking you to name the new layer. Accept the default name of Layer 0 or type any preferred name and click OK. The layer is now fully unlocked and editable, and the padlock icon disappears from the Layers panel entry.
How to reset settings in Adobe Photoshop 7.0
To reset all Photoshop 7.0 preferences and settings to factory defaults, hold down Ctrl, Alt, and Shift simultaneously immediately after launching Photoshop before the application fully loads. A dialogue box will appear asking whether you want to delete the Adobe Photoshop Settings File. Click Yes to reset all preferences to their defaults. This resolves many common Photoshop 7.0 problems including crashes on launch, incorrect colour management behaviour, and missing or corrupted tool presets. Note that resetting preferences will erase all your saved workspaces and custom settings.
How to save a picture in Adobe Photoshop 7.0
Press Ctrl and S to save the file in its current format. If it is a new file or a PSD being saved as a different format, the Save As dialogue opens. To save as JPEG, go to File then Save As and choose JPEG from the Format dropdown, then set the quality between 1 and 12 in the JPEG Options dialogue. For web-optimised output, use File then Save for Web (Ctrl, Alt, Shift, and S) and choose JPEG, GIF, or PNG format with size and quality controls. Save as PNG for images requiring transparent backgrounds.
How to open a PDF file in Adobe Photoshop 7.0
Go to File then Open, navigate to the PDF file and click Open. Photoshop 7.0 will display a PDF Rasterize dialogue asking which page to open if the PDF contains multiple pages, and what pixel resolution to rasterize it at. Choose 300 PPI for a print-quality editable version or 150 PPI for a screen-quality version. Click OK and Photoshop rasterizes the PDF page into a flat pixel layer. Note that this converts the PDF content into pixels, which means text will no longer be editable as text once rasterized.
How to draw a circle in Adobe Photoshop 7.0
Select the Ellipse Shape Tool from the toolbar. Hold the Shift key while clicking and dragging on the canvas to draw a perfect circle constrained to equal width and height. Without holding Shift, dragging creates an oval at any proportion. The circle appears as a shape layer with a solid colour fill. Change the fill colour by double-clicking the layer thumbnail to open the Color Picker. Apply Layer Styles such as Stroke to add an outline border to the circle, or Gradient Overlay to fill it with a gradient rather than a solid colour.
How to draw a table in Adobe Photoshop 7.0
Photoshop 7.0 does not have a dedicated table creation tool. Draw tables manually using the Line Shape Tool to create horizontal and vertical grid lines. Set a precise pixel stroke width in the options bar for consistent line thickness throughout the table. Use the Rectangle Shape Tool to create the overall table border. Add text in each cell using the Type Tool with a separate text layer for each cell. For a quicker approach, design the table as a grid in HTML or a spreadsheet application, take a screenshot, and paste it into Photoshop as an image layer for further stylistic treatment.
How to use the Magic Wand tool in Adobe Photoshop 7.0
Press W to select the Magic Wand Tool. The key setting is Tolerance in the options bar, which controls the colour range selected. A Tolerance of 0 selects only the exact colour clicked. A Tolerance of 32 (the default) selects that colour plus colours up to 32 shades similar. A Tolerance of 100 or more selects a very broad colour range. The Contiguous option when checked selects only adjacent pixels of similar colour, which is useful for background removal. When unchecked, the Magic Wand selects all pixels of similar colour anywhere in the image regardless of whether they are connected.
How to use the pen tool in Adobe Photoshop 7.0
Press P to select the Pen Tool. Ensure Paths is selected in the options bar rather than Shape Layers for selection work. Click on the canvas to place the first anchor point. For a straight line to the next point, simply click the next position without dragging. For a curve, click and drag in the direction you want the curve to flow, which creates direction handles that define the curvature. Continue tracing the outline of your subject. To close the path, hover over the first anchor point until a small circle appears beside the pen cursor, then click. Save the path in the Paths panel and right-click to make a selection.
How to use Adobe Photoshop 7.0 tools step by step for beginners
Begin with the Move Tool (V) for repositioning layers. Learn the Marquee tools (M) for rectangular and circular selections. Progress to the Lasso Tool (L) for freehand selection. Use the Magic Wand (W) for colour-based selection. Learn the Crop Tool (C) for trimming images. Use the Healing Brush (J) and Clone Stamp (S) for retouching. Understand the Brush Tool (B) and Eraser (E) for painting and erasing. Learn the Type Tool (T) for adding text. Study the Shape Tool (U) for graphic elements. Finally learn the Pen Tool (P) for precision paths. Follow the beginner guide on our getting started page for the complete structured learning path.
How to update Adobe Photoshop 7.0 to CS6 or CS5
Photoshop 7.0 cannot be directly updated or upgraded to CS5, CS6, or any Creative Suite version. These are entirely separate products that require a separate purchase and fresh installation. As of 2026, Adobe no longer sells CS5 or CS6 individually as they have been discontinued alongside the subscription-only Photoshop CC. If you want to move from Photoshop 7.0 to a more modern version, the current options are Photoshop CC via Creative Cloud subscription, Photoshop Elements as a one-time purchase, or the free alternatives GIMP and Photopea which offer comparable feature sets without any cost.
How to register Adobe Photoshop 7.0
During installation the setup wizard asks for a serial number to register the software. Enter the serial number from your original purchased copy packaging and complete the online registration if prompted. Adobe's online registration server for Photoshop 7.0 is no longer active as the product has been discontinued for over 20 years. If the installer requires activation and the activation server is unavailable, the software should still function in a trial or fully licensed state depending on the specific installer version obtained from preservation archives.
How to change image size in Adobe Photoshop 7.0
Use Alt, Ctrl, and I as the keyboard shortcut to open Image Size directly, or go to Image then Image Size from the menu. The dialogue shows current pixel dimensions, document size in inches or centimetres, and resolution in PPI. Constrain Proportions should be checked to maintain the aspect ratio when changing one dimension. Resample Image should be checked and set to Bicubic for the highest quality resampling when enlarging, or Bicubic Sharper when reducing. Click OK to apply the size change to the entire document.
How to change background in Adobe Photoshop 7.0
First remove the original background using the Magic Wand Tool, selecting the background colour and pressing Delete. If the background layer is locked, unlock it by double-clicking the layer in the Layers panel. Open your new background image, select all and copy it. Return to your subject file and paste the new background with Ctrl and V. In the Layers panel, drag the new background layer below the subject layer. Use Edit then Free Transform to scale the background image to fill the entire canvas. Adjust the background brightness and colour through Image Adjustments to match the lighting on your subject.
Adobe Photoshop 7.0 System Requirements
Original 2002 technical specifications plus what you actually need to run Photoshop 7.0 on modern hardware in 2026
Windows Requirements (Original)
- Operating System
- Windows 98, ME, NT with SP6a, 2000 with SP2, or XP
- Processor
- Intel Pentium III or 4 processor, or equivalent
- RAM
- 128 MB minimum, 256 MB or more recommended for best performance
- Hard Disk Space
- 280 MB of available disk space required for installation
- Display
- 800 by 600 pixels minimum at 16-bit colour depth or greater
- Graphics Card
- Any card that supports hardware acceleration
- Input Devices
- Compatible with mouse, stylus, and graphics tablet
Mac Requirements (Original)
- Operating System
- Mac OS 9.1, 9.2, or Mac OS X version 10.1.3 through 10.4 Tiger
- Processor
- PowerPC G3, G4, or G4 dual processor
- RAM
- 128 MB minimum, 192 MB or more recommended
- Hard Disk Space
- 320 MB of available disk space required for installation
- Display
- 800 by 600 pixels minimum at 16-bit colour depth or greater
- CD-ROM
- Required for installation from physical disc media
Windows 10 and 11 in 2026 (Tested)
- Compatibility Mode
- Windows XP SP3 compatibility mode required, enable in shortcut Properties
- Processor
- Any Intel Core i3, i5, i7, or AMD Ryzen processor far exceeds requirements
- RAM
- 4 GB or more exceeds the minimum requirement by over 30 times
- Storage
- Any SSD or HDD with at least 1 GB free space
- Display
- Any modern monitor works; high DPI displays may need DPI override setting
- Verified Working On
- Windows 10 22H2 and Windows 11 23H2 both confirmed working
Supported File Formats
- Native Photoshop
- PSD (Photoshop Document) and PSB (Large Document Format)
- Common Image
- JPEG, PNG, GIF, BMP, TIFF, PCX, TGA, Pixar, ScitEx CT
- Print Formats
- EPS, PDF, DCS 1.0 and DCS 2.0
- Web Output
- HTML slices via Save for Web, SWF via ImageReady
- RAW Files
- Limited to camera models from 2002 and earlier only
- Not Supported
- HEIC, WebP, AVIF, modern video formats, contemporary RAW files
Yes. Every laptop manufactured since 2010 easily exceeds all of Photoshop 7.0's original hardware requirements by a significant margin. A laptop running Windows 10 or Windows 11 can run Photoshop 7.0 after configuring the compatibility mode settings described in the install guide above. The only consideration specific to modern laptops is display scaling on high-resolution screens, which requires enabling the DPI override in the Compatibility properties to prevent the Photoshop interface from appearing blurry or scaled incorrectly.
Adobe Photoshop 7.0 Pros and Cons in 2026
A completely honest evaluation of what Photoshop 7.0 delivers well and where it falls short for modern users
Advantages of Photoshop 7.0
- Extremely lightweight at 220 to 280 MB, runs fast even on old hardware
- Very easy-to-learn interface with logical, intuitive tool organisation
- Professional-grade Healing Brush and retouching toolkit
- Original one-time purchase model, no monthly subscription required
- Minimum 128 MB RAM means it works on very low-spec older PCs
- Full layer-based non-destructive editing workflow
- Vector text rendering, sharp at any document size
- Scripting support for batch automation via AppleScript and JavaScript
- Compatible with Windows 10 and 11 through compatibility mode
- Large ecosystem of third-party plugins available from the early 2000s
- Ideal for teaching and learning core Photoshop concepts and techniques
- Freely accessible through software preservation archives in 2026
Disadvantages of Photoshop 7.0
- Zero security patches since 2002, potential vulnerability on networked systems
- No Adobe Creative Cloud integration or cloud file synchronisation
- No Content-Aware Fill, which was only introduced in Photoshop CS5 in 2010
- Very limited RAW file support for cameras made after 2002 only
- No Smart Objects with non-destructive scaling introduced in CS2
- Cannot handle modern file formats such as HEIC, WebP, and AVIF
- 32-bit architecture only, cannot use more than 4 GB of RAM
- No GPU acceleration for any filter, transform, or rendering operation
- Officially discontinued and unsupported by Adobe since 2002
- No video editing timeline or motion graphics capability
- Interface appearance is dated compared to current software standards
- Complex legal status regarding distribution and serial numbers in 2026
What Photoshop 7.0 Lacks Compared to Modern Software
Features you will need to live without if Photoshop 7.0 is your primary editing tool in 2026
No Security Updates Since 2002
Adobe Photoshop 7.0 has not received a single security patch in over 23 years. While the practical risk of running a desktop image editor without network access is low, using it on systems connected to the internet could expose those systems to theoretical vulnerabilities in the file parsing code. For security-sensitive environments, use Photoshop 7.0 on isolated systems and avoid opening files received from untrusted sources.
No Content-Aware Fill
Content-Aware Fill introduced in Photoshop CS5 in 2010 is arguably the most useful single feature added to Photoshop since the Healing Brush in 7.0. It analyses surrounding image content and intelligently fills any selected area with generated matching content, making object removal trivially easy. In Photoshop 7.0, removing objects requires manual cloning and patching, which is time-consuming and demands more skill from the user.
No AI or Neural Filter Features
Modern Photoshop CC includes Generative Fill powered by Adobe Firefly AI for creating content from text prompts, Neural Filters for one-click skin smoothing, portrait colorisation, and style transfer, and Sky Replacement for automatic sky swapping. None of these capabilities exist in any form in Photoshop 7.0. For AI-powered editing without a subscription, the free online editor Photopea or GIMP with appropriate plugins come closest to bridging this gap.
Very Limited RAW File Support
Photoshop 7.0 can only natively open RAW image files from digital cameras that existed before 2002, which means practically no camera you can buy or find in use today. Any RAW file from a DSLR, mirrorless, or even a modern smartphone will be unrecognisable to Photoshop 7.0. The workaround is to use a separate free RAW converter such as RawTherapee or Darktable to export your RAW files as TIFF or JPEG before opening them in Photoshop 7.0 for editing.
No Official Windows 10 or 11 Support
Adobe Photoshop 7.0 officially and exclusively supports Windows 98, ME, 2000, and XP. It was never tested on, certified for, or updated to support Windows 7, 8, 10, or 11. While the compatibility mode workaround described in this guide allows it to function on modern Windows versions, it is not officially supported and some features including specific filter effects and scratch disk configuration may behave differently from their intended original behaviour.
No Cloud or Mobile Integration
Adobe Creative Cloud introduced in 2013 enables file synchronisation between devices, mobile companion apps for on-the-go editing, and collaboration features for team workflows. Photoshop 7.0 predates cloud computing entirely and all work files are stored exclusively on the local drive of the computer running the application. There is no mobile version, no syncing, no remote access, and no collaboration capability of any kind.
Best Alternatives to Adobe Photoshop 7.0
Thirteen free and paid alternatives compared with honest assessments of each, including pricing, best use case, and key features
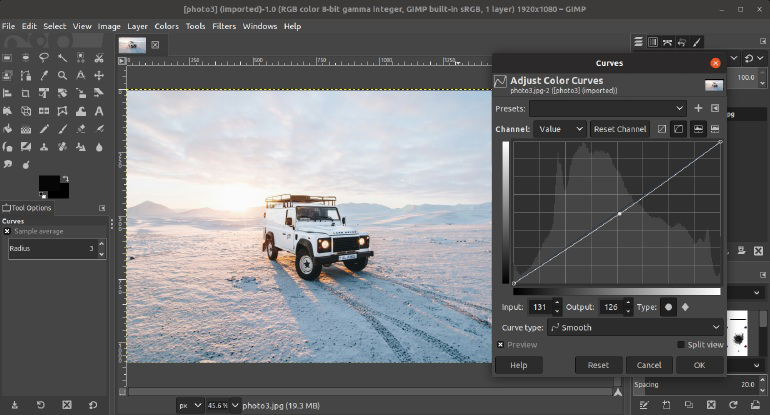
GIMP (Free, Open-Source)
The most capable and complete free alternative to Adobe Photoshop 7.0. GIMP provides professional-grade layer support with blend modes, healing and clone tools for retouching, advanced selection tools, script-fu for automation, and a large plugin ecosystem actively maintained by the open-source community. Available for Windows, macOS, and Linux. Best overall replacement for budget users who need genuine professional results.
Full GIMP vs Photoshop 7.0 comparison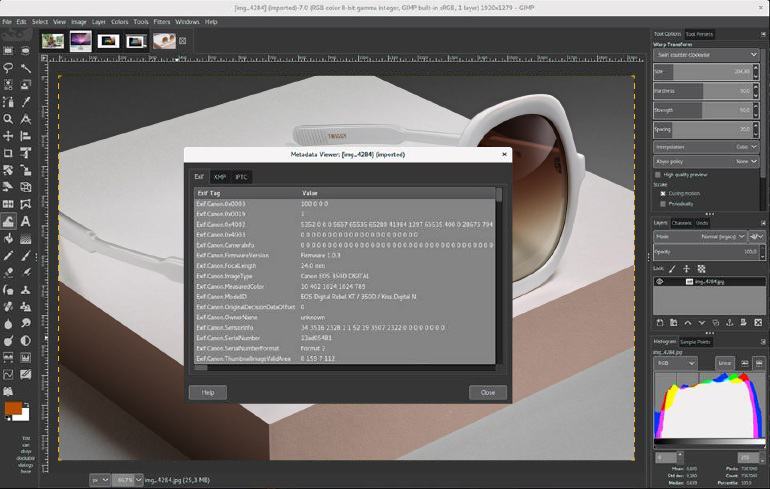
GNU Image Manipulation Software
The modular, low-resource design of this software makes it particularly well-suited for older hardware and systems with limited RAM. Supports Windows, macOS, and Linux. Provides advanced layer management, healing tools, cloning, full retouching capability, and is regularly updated through the open-source development community on GitHub. Best for budget-conscious designers on PCs with limited processing power.
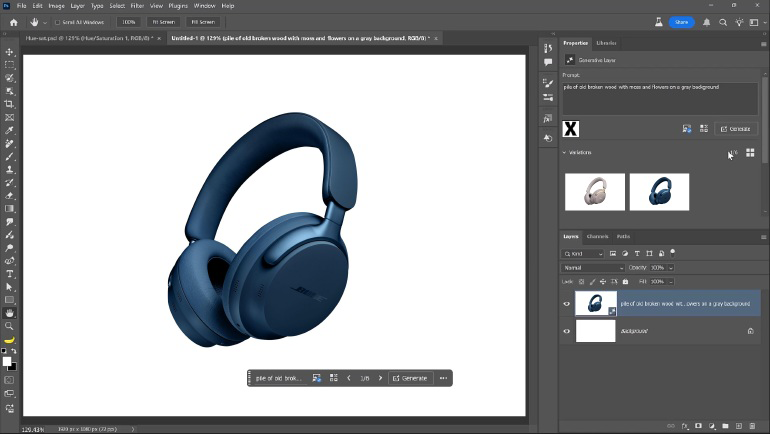
Adobe Photoshop CC 2025
The official modern successor to Photoshop 7.0 and the most powerful image editing software available in 2026. Includes every feature of Photoshop 7.0 plus AI Generative Fill, Neural Filters, Content-Aware Fill, Sky Replacement, full RAW support for all modern cameras, and Creative Cloud synchronisation. A 7-day free trial is available. Best for professionals who need the complete modern feature set.
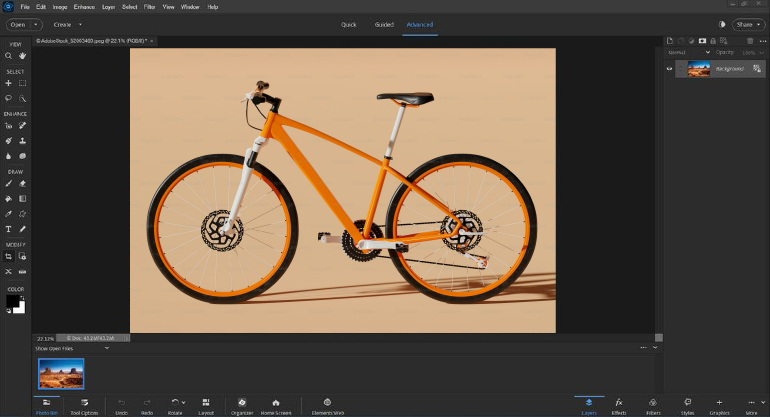
Adobe Photoshop Elements
The simplified Adobe product for consumers and hobbyists, sold as a one-time purchase without any monthly subscription requirement. Features guided editing modes ideal for complete beginners, AI-powered Auto Tone and Colour Correction, batch editing for large photo collections, and full compatibility with PSD files from Photoshop. Receives regular official updates from Adobe. Best for casual users who want Adobe-quality results at a manageable one-time price.
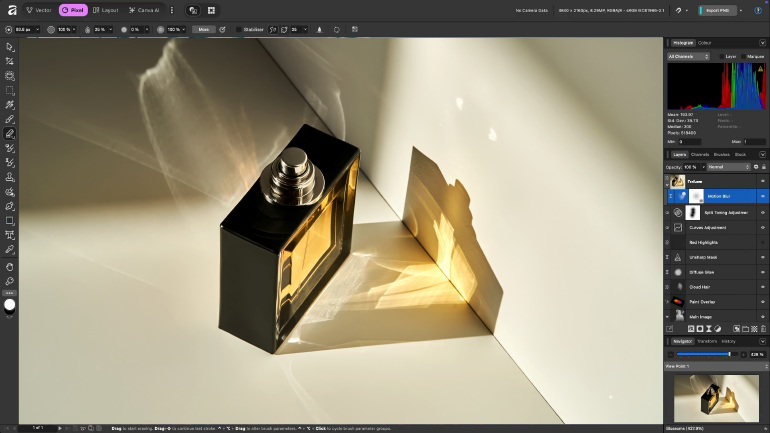
Affinity Photo (Mac and Windows)
A professional-grade photo editor with a one-time purchase model and no subscription requirement. Provides non-destructive editing with full adjustment layers, comprehensive RAW support for all modern camera formats, a 64-bit architecture that can use all available system RAM, and feature parity with Photoshop CC in most professional editing areas. Best for professional photographers wanting full capability without a monthly recurring cost.
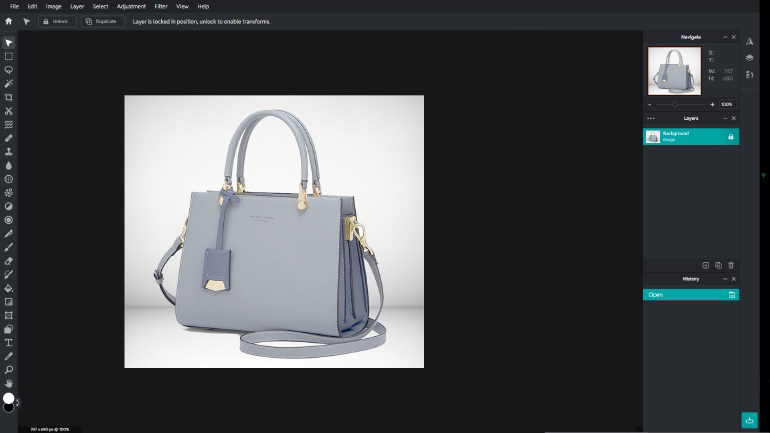
Pixlr (Free Online)
A fully browser-based image editor that requires no installation and works on any device with a modern web browser including smartphones and tablets. Provides layer support, basic retouching tools, AI-powered editing features, PSD file compatibility, and a mobile app for on-the-go editing. Best for users who need quick edits accessible from any device anywhere without software installation.
See all online alternatives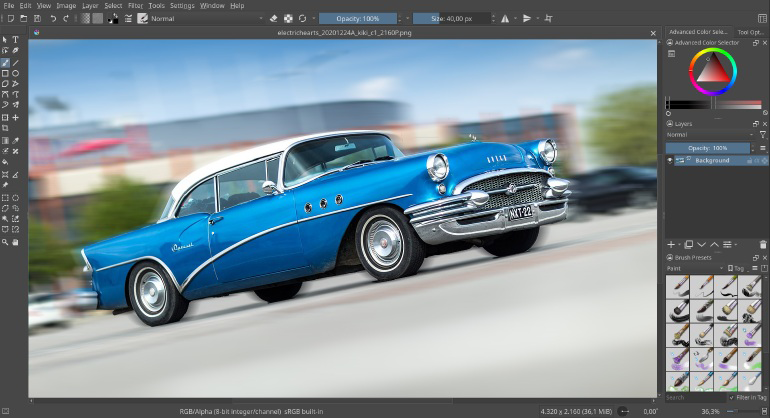
Krita (Free, Open-Source)
The leading free open-source application for digital painting, illustration, and concept art. Offers an advanced brush engine with hundreds of customisable brush presets, full animation timeline support, symmetry and mirror drawing tools, HDR colour management, and cross-platform availability. Best for digital artists, illustrators, and character designers who need painting and drawing tools rather than photo retouching.
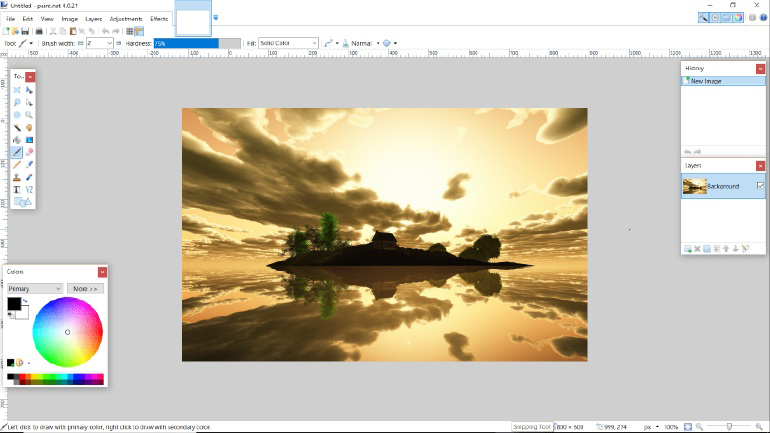
Paint.NET (Windows Only)
Lightweight, fast, and immediately intuitive for Windows users of all skill levels. Provides layer support, basic retouching tools, selection tools, filters, and a growing plugin library for extended functionality. Launches in seconds and uses minimal system resources. Best for Windows users who need to complete straightforward image editing tasks quickly without the learning curve associated with GIMP or Photoshop.
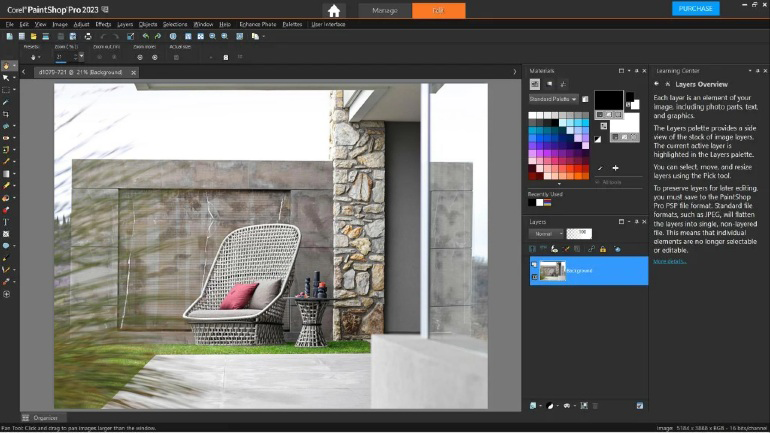
Corel PaintShop Pro
A professional Windows photo editor sold at a one-time price with no subscription. Provides advanced photo enhancement tools, comprehensive RAW image editing for modern cameras, custom effects and filters, a layer-based editing system comparable to Photoshop, and an intuitive user interface with a shorter learning curve than full Photoshop CC. Best for Windows users who want professional editing capability at a fixed one-time investment.
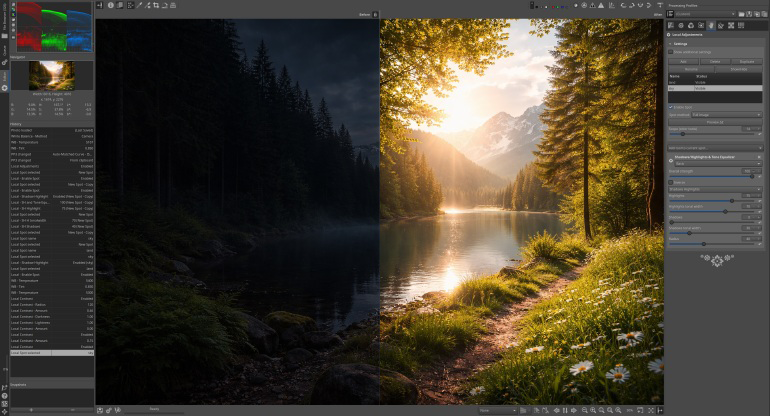
RawTherapee
One of the most capable free RAW image processors available. Provides advanced tone mapping, colour correction, noise reduction, lens correction, and completely non-destructive processing that writes sidecar files rather than modifying originals. Supports an extremely wide range of camera RAW formats including the latest Sony, Canon, Nikon, Fujifilm, and smartphone RAW files. Best for photographers who shoot RAW and need professional-quality processing that Photoshop 7.0 cannot provide.
IrfanView
An ultra-fast Windows image viewer with powerful batch processing capabilities for quick image optimisation tasks. Supports an exceptionally wide range of file formats including PNG, JPEG, TIFF, BMP, RAW formats, and many specialised formats. Provides basic editing tools including crop, resize, rotate, brightness and contrast adjustment, and colour correction. Best for users who primarily need to view, organise, and batch-process large collections of images efficiently.
FastStone Image Viewer
A simple and lightweight image browser and viewer with basic editing tools including crop, resize, rotate, brightness adjustment, and colour correction. Can also create slideshows and generate videos from image sequences. The interface is minimal and requires almost no learning curve. Best for users who need to browse, view, and make light edits to photos as quickly as possible without any of the complexity of a full image editor.
Canva Pro
A cloud-based design platform built around an intuitive drag-and-drop interface, a library of thousands of professionally designed templates, a built-in stock image library, AI-powered background removal, brand kit management, and a mobile app for designing anywhere. Not a traditional photo editor but an all-in-one visual design platform that is significantly faster for template-based creative work. Best for social media content creators, marketers, and non-designers who need professional-looking graphics produced quickly.
Photo Editing Software Comparison Table 2026
Adobe Photoshop 7.0 versus every major alternative: price, learning curve, AI features, cloud sync, and RAW support
| Software | Price | Best For | Learning Curve | AI Features | Cloud Sync | RAW Support |
|---|---|---|---|---|---|---|
| Photoshop 7.0 (This Guide) | Legacy Access | Budget editing and learning | Moderate | None | No | 2002 cameras only |
| Photoshop CC 2025 | USD 23.49 per month | Professionals | Moderate | Excellent | Yes | All cameras |
| GIMP | Free | Budget users | Steep | Limited | No | Via plugin |
| Photoshop Elements | USD 99 one-time | Hobbyists | Easy | Good | Yes | Yes |
| Affinity Photo | USD 79.99 one-time | Professionals | Moderate | Limited | No | Yes |
| GNU Image Manipulation | Free | Budget designers | Moderate | None | No | Via plugin |
| Pixlr Online | Free | Quick edits anywhere | Very Easy | Good | Yes | No |
| Canva Pro | USD 14.99 per month | Social media creators | Very Easy | Good | Yes | No |
| Krita | Free | Digital artists | Steep | Limited | No | No |
| Paint.NET | Free | Basic Windows users | Very Easy | None | No | No |
| Corel PaintShop Pro | USD 99.99 one-time | Advanced Windows editors | Moderate | Good | No | Yes |
| RawTherapee | Free | RAW photographers | Moderate | None | No | Excellent |
| FastStone Image Viewer | Free | Image browsing and viewing | Easy | None | No | No |
| IrfanView | Free | Fast image optimisation | Moderate | None | No | No |
Adobe Photoshop 7.0 vs Adobe Photoshop CC: Complete Comparison
| Feature | Photoshop 7.0 (2002) | Photoshop CC 2025 |
|---|---|---|
| Interface Design | Traditional floating toolbars and palettes | Modern unified workspace with dark mode option |
| Pricing Model | One-time purchase (now discontinued) | USD 23.49 per month subscription required |
| Security Updates | None received since 2002 | Monthly security patches from Adobe |
| Creative Cloud Integration | None available | Full Creative Cloud file sync and sharing |
| AI-Powered Features | None available | Generative Fill, Neural Filters, Sky Replace |
| RAW File Processing | Pre-2002 cameras only | All modern cameras via Camera Raw plug-in |
| Content-Aware Fill | Not available | Full Content-Aware technology suite |
| System Architecture | 32-bit only, maximum 4 GB RAM usage | 64-bit, uses all available system RAM |
| GPU Acceleration | None supported | Full CUDA and OpenCL GPU support |
| Video Editing | None, ImageReady handles GIF animation only | Full timeline video editor included |
| Minimum System Requirement | 128 MB RAM, Pentium III processor | 8 GB RAM, 4-core processor or higher |
| Adobe Technical Support | Zero support, product discontinued | Full Adobe customer and technical support |
| Best Suited For | Budget users, learners, legacy workflow compatibility | Professional photographers, designers, video creators |
The conclusion is straightforward. If you need AI-powered editing, RAW processing for any modern camera, Creative Cloud collaboration, or full professional support, choose Photoshop CC or one of the free alternatives. If you need a lightweight, fast, and free tool for everyday photo retouching, background removal, text design, and basic compositing on a budget PC with modest specifications, Photoshop 7.0 continues to deliver genuinely useful professional results for its primary use cases.
Should You Download Photoshop 7.0 from Pirated Sites?
A significant proportion of searches for Adobe Photoshop 7.0 free download lead users to websites distributing pirated, cracked, or modified versions of the installer. These files present serious and well-documented risks that every potential user must understand before downloading from any unofficial source.
Malware and Viruses
Files downloaded from pirated software sites are documented to contain viruses, trojans, ransomware, and keyloggers in the vast majority of cases. Hackers upload fake or modified software installers with malware payloads designed to steal banking credentials, passwords, personal files, and cryptocurrency wallet keys. Running an untrusted installer file with administrator privileges gives the malware complete control of your system within seconds of execution.
Antivirus Will Delete It
Pirated Photoshop 7.0 installers contain crack files, key generators, and patched executable files that trigger immediate detection by every major antivirus and Windows Defender. Even if the installation initially succeeds, the antivirus software will quarantine and delete the modified files during its next scheduled scan, rendering the installation broken and unusable without warning. This defeats the purpose of the download entirely.
No Cloud or Update Access
A pirated copy of Photoshop 7.0 activated with a stolen or generated serial number is not legitimately registered with Adobe's activation system. As a result, no Adobe services, cloud connectivity, or update delivery will function. When Adobe does distribute critical bug patches through legitimate channels, pirated copy users cannot receive them and remain on the unpatched, potentially unstable version indefinitely.
Risk to Your Projects and Data
Malware distributed through pirated creative software specifically targets the work files of creative professionals, including PSD files, design project folders, and client data. Some sophisticated malware variants encrypt the entire contents of creative project folders and demand a ransom payment for decryption. Losing years of client work and professional projects over a free download is a risk that no rational assessment supports taking.
Use the Internet Archive preservation copy which is clean and virus-free as verified by the archive's integrity checking systems. Alternatively, use the 7-day free trial of Photoshop CC available directly from Adobe's website, or switch entirely to GIMP which is completely free, fully safe to download, and provides comparable professional capability for most common editing tasks.
How to Download Adobe Photoshop 7.0
Our dedicated download guide explains every legitimate option for obtaining Photoshop 7.0 in 2026, including Internet Archive preservation links, file verification steps, and how to confirm the installer is clean before running it.
Every Photoshop 7.0 Topic Covered on This Site
Use the links below to jump directly to the guide or tutorial most relevant to what you need
- Adobe Photoshop 7.0 Free Download
- Adobe Photoshop 7.0 Free Download Full Version
- Adobe Photoshop 7.0 Download for 64-Bit Windows
- Adobe Photoshop 7.0 Download via Google Drive
- How to Install Photoshop 7.0 in Windows 10
- How to Install Photoshop 7.0 in Windows 11
- How to Install Photoshop 7.0 in a Laptop
- Photoshop 7.0 Not Opening on Windows 10
- Adobe Photoshop 7.0 Android APK: The Truth
- How to Use Photoshop 7.0 Step by Step
- How to Edit Photos in Photoshop 7.0
- How to Learn Photoshop 7.0 Step by Step
- How to Crop a Photo in Photoshop 7.0
- How to Resize an Image in Photoshop 7.0
- How to Rotate an Image in Photoshop 7.0
- How to Adjust Brightness in Photoshop 7.0
- How to Change Background in Photoshop 7.0
- How to Remove Background in Photoshop 7.0
- How to Remove Pimples in Photoshop 7.0
- How to Remove Dark Circles in Photoshop 7.0
- How to Smooth Skin in Photoshop 7.0
- How to Make Face White in Photoshop 7.0
- How to Make Skin Fair in Photoshop 7.0
- How to Make Face Glow in Photoshop 7.0
- How to Blur Background for Portrait Effect
- How to Swap Face in Photoshop 7.0
- How to Change Hair Colour in Photoshop 7.0
- How to Design a Logo in Photoshop 7.0
- How to Make a Banner in Photoshop 7.0
- How to Design a Poster in Photoshop 7.0
- How to Make a Visiting Card in Photoshop 7.0
- How to Make a Brochure in Photoshop 7.0
- How to Make a Collage in Photoshop 7.0
- How to Make a Photo Album in Photoshop 7.0
- How to Make a Frame in Photoshop 7.0
- How to Make a Stamp in Photoshop 7.0
- How to Add Text in Photoshop 7.0
- How to Use the Pen Tool in Photoshop 7.0
- How to Use the Magic Wand Tool in Photoshop 7.0
- How to Use the Gradient Tool in Photoshop 7.0
- How to Draw a Circle in Photoshop 7.0
- How to Merge Photos in Photoshop 7.0
- How to Add Two Photos Together in Photoshop 7.0
- How to Unlock a Layer in Photoshop 7.0
- How to Reset Settings in Photoshop 7.0
- How to Make 3D Text in Photoshop 7.0
- How to Make a GIF in Photoshop 7.0
- How to Create Animation in Photoshop 7.0
- How to Change Dress Colour in Photoshop 7.0
- How to Make a Passport Photo in Photoshop 7.0
- How to Open a PDF File in Photoshop 7.0
- How to Write Hindi Text in Photoshop 7.0
- Photoshop 7.0 Filters and Plugins Free Download
- Photoshop 7.0 Shortcut Keys PDF Free Download
Popular Sections on Photoshop 7.0 Hub
Shortcut Keys with Free PDF Download
Every keyboard shortcut in Adobe Photoshop 7.0 organised by tool category, with a clean printable PDF available for free download. The most comprehensive redesigned Photoshop 7.0 shortcut reference available on the internet, verified against the original documentation.
Beginner Tutorial: Getting Started
A complete structured introduction to Adobe Photoshop 7.0 covering the full interface layout, all tools explained with examples, how to work with layers, and your first complete photo edit from start to finish. Designed for first-time users and those returning to the software after years away.
Install on Windows 10 and 11
Tested compatibility mode installation guide for Windows 10 version 22H2 and Windows 11 version 23H2. Includes specific solutions for every documented installation error including missing DLL files, activation server unavailability, and crash-on-launch diagnosis with resolution steps.
Background Removal Tutorial
Three complete methods for removing backgrounds in Photoshop 7.0, from the quick Magic Wand approach for solid colour backgrounds to the precise Pen Tool method for complex edges and the Background Eraser technique for hair, fur, and fine transparent detail.
Interactive Shortcut Key Finder
Search and filter every Photoshop 7.0 keyboard shortcut in real time by tool name, key combination, or function category. Works entirely in the browser with no installation required, and loads in under one second for instant access whenever you need to find a specific shortcut.
Troubleshooting: Photoshop 7.0 Will Not Open
Specific fixes for Photoshop 7.0 failing to open or launch on Windows 10 and 11, including compatibility mode configuration, missing DLL file replacements for msvcrt.dll and msvcp60.dll, DPI scaling fixes for high-resolution displays, and crash-on-launch diagnosis.
Photoshop 7.0 FAQ: Every Common Question Answered
Honest, verified answers to the most frequently asked questions about Adobe Photoshop 7.0
How can I download Adobe Photoshop 7.0 for free?
How to install Adobe Photoshop 7.0 in Windows 10 or Windows 11?
What is the serial number for Adobe Photoshop 7.0?
Is Adobe Photoshop 7.0 compatible with Windows 10 and Windows 11?
How to remove background in Adobe Photoshop 7.0?
How to edit photos in Adobe Photoshop 7.0 step by step?
How to install Adobe Photoshop 7.0 in a laptop?
When was Adobe Photoshop 7.0 released and which year is it from?
How to download Adobe Photoshop 7.0 for Windows 7, Windows 10, or PC?
How to update Adobe Photoshop 7.0 to CS5, CS6, or a newer version?
What file formats does Adobe Photoshop 7.0 support?
How to use Adobe Photoshop 7.0 for beginners in Hindi, Telugu, Tamil, or Bangla?
Is Adobe Photoshop 7.0 available for Android or mobile?
How to register Adobe Photoshop 7.0?
Adobe Photoshop 7.0 was and remains a commercial software product owned and copyrighted by Adobe Inc. It was never released as freeware or open-source software. Adobe no longer sells Photoshop 7.0, but its discontinuation does not make it free to use without a valid license. Any copies currently circulating online are either legitimate preservation copies through authorised archives, or illegal distributions. This site does not host installers, serial numbers, cracks, or keygens. Photoshop 7.0 Hub is not affiliated with, endorsed by, or connected to Adobe Inc. in any way. "Adobe" and "Photoshop" are registered trademarks of Adobe Inc. See our Disclaimer page for the complete legal position regarding this site and its content.
Written and Verified by an Expert
Every guide on this site is written by a practising professional with hands-on experience in Adobe Photoshop